Preparing to Teach: Lessons from a Gamemaster

Once upon a time, just before the age of COVID-19, I was asked to teach a course for an undergraduate minor program through JHU’s Center for Leadership Education. I began my journey to teaching my first course by meeting the program director for lunch. After the proposition, it became clear to me that there was sparse content for this new course on data visualization, and it would be up to me to develop and deliver it the following semester. With only a few months to prepare, I quickly realized that my quest to create something from nothing would be full of challenges that might result in a perilous journey, but the bounties were rumored to be plentiful.

When I started to delve into the instructional design of my course including developing content, setting learning goals, and creating a syllabus, I was delighted by the discovery that there are many parallels between designing a course and creating an adventure for Dungeons and Dragons (D&D). D&D is a type of role-playing game where players take on roles of fictional characters and attempt to complete a fantasy adventure designed and delivered by the Dungeon Master (I will use the term “gamemaster” for its broader applicability). In a D&D adventure, the gamemaster introduces the fantasy world to the players and presents challenges for them to overcome by performing actions as their characters.  As a gamemaster, I realized that I had resources that would help me structure the course, plan activities, and engage my students.

Learning Goals vs Plotline

One of the first parallels I found was that the learning goals provided a structure much like plot elements would provide a structure to a D&D adventure. The gamemaster tells stories and sets the stage for the players to interact, and, with the stories, they build on each other to an eventual climactic event. In both cases, you have to sequence the elements in a logical way that builds up to the desired result such as a learning goal or a successful adventure. For instance, one of my learning goals was to have students apply visual design principles to different types of presentations of data. I invested time up front in my course structure to ensure students knew a variety of data visualization types, could identify design principles that work for each, and had practice applying those design techniques. Ensuring your participants are adequately prepared for their true test is important, whether it be acing their final project or slaying an evil dragon.

Activities vs Encounters

Planning activities for each class felt closely related to the gamemaster’s balancing act of creating encounters for their players. In D&D, each player controls a character with specific abilities set by their current level. As a character gains experience, they unlock more abilities as they reach the next level. The gamemaster has to make sure that at each level, the challenge of each encounter is commensurate with the players’ levels to keep them engaged.

For many weeks in the course, I highlighted a topic that would span two class periods that bookended the weekend. Before the first day, there would be a reading to introduce the topic, followed by a lecture at the beginning of the first day to expand on the topic (the background). 
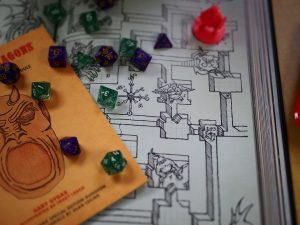
Then, the students would work on an activity in class, most times in groups, that utilized the concepts presented in the introduction (an encounter). At the end of the activity, we would chat about the results and the related assignment that would be due the following week (rest and reflect). During that weekend, the students would have a short reading that was relevant to the topic and would complete their assignment (continued journey). On the second day for that topic, we would begin the class with a zero-stakes quiz that was based on the readings and mini lecture (another encounter). We then discussed the assignment submissions in a class critique, offering feedback and best practices in a safe setting (the aftermath). The last portion of the class would expand on the topic with one last activity on the topic (gain experience).

Being a Good Host

Just like sitting down for a game of D&D, when teaching your class, you are welcoming students into your space.  It’s not a space you own, but it is one in which you have control over the tone and the proceedings. As a good host, whether for a dinner party, a classroom activity, or a D&D adventure to clear out a cave of kobolds, you must be aware of how your guests are responding to the experience. In the case of D&D, that means being aware of how each player is interacting and contributing to the story you are building together. From the classroom perspective you should be similarly mindful of student engagement and progress. You can achieve this not only with summative assessments (the results from quizzes, assignments, etc.) but also formative assessments (ungraded quizzes, surveys, etc.). For example, a mid-semester survey can help inform you of what the students are enjoying about the class, what could make it better, and any issues with the content that they are having trouble with.

Side Quests

The concept of a Side Quest in gaming refers to an optional task to achieve a supplemental benefit for your character. I used this concept to offer extra-credit assignments that would allow the students to gain bonus points towards assignments, participation, or the final project. The Side Quests provided the opportunity for the students to reengage with the content, give them more data visualization practice, or reflect deeper on topics. The following are examples of a few of my favorite Side Quest assignments:

  • Find the Gestalt!”: Students find a data visualization and describe what gestalt technics were used and where. This provided more practice identifying technics in the wild.
  • You be the Instructor!”: Students develop up to five challenging quiz questions from the course content that had accurate answers. This allowed them to think deeper about a topic.
  • Journal of the Journey!”: Students submit pages from their class notes/sketchbook. This incentivized them to record tidbits from class that they found interesting, which gave me feedback on the parts of the course that resonated with the students.

Final Thoughts

D&D helped me to pull from years of experience as a gamemaster. In the end, as long as you are thoughtfully guiding your participants/students/adventurists to new heights through balanced challenges, they will all surely level up to be ready for their next adventure.

Reid Sczerba, Digital Solutions Designer
Center for Teaching Excellence and Innovation

Image Source: Reid Sczerba, Pixabay

This blog post was adapted from the full article, “Lessons from a Gamemaster,” which is part of our printed Innovative Instructor series.

Expanding Students’ Research Skills with a Virtual Museum Exhibit

Morgan Shahan received her PhD in History from Johns Hopkins University in 2020. While at Hopkins, she received Dean’s Teaching and Prize Fellowships. In 2019, her department recognized her work with the inaugural Toby Ditz Prize for Excellence in Graduate Student Teaching. Allon Brann from the Center for Educational Resources spoke to Morgan about an interesting project she designed for her fall 2019 course,“Caged America: Policing, Confinement, and Criminality in the ‘Land of the Free.’”

I’d like to start by asking you to give us a brief description of the final project.  What did your students do?

Students created virtual museum exhibits on topics of their choice related to the themes of our course, including the rise of mass incarceration, the repeated failure of corrections reform, changing conceptions of criminality, and the militarization of policing. Each exhibit included a written introduction and interpretive labels for 7-10 artifacts, which students assembled using the image annotation program Reveal.  On the last day of class, students presented these projects to their classmates. Examples of projects included: “Birthed Behind Bars: Policing Pregnancy and Motherhood in the 19th and 20th Centuries,” “Baseball in American Prisons,” and “Intentional Designs: The Evolution of Prison Architecture in America in the 19th and 20th Centuries.”

Can you describe how you used scaffolding to help students prepare for the final project?

I think you need to scaffold any semester-long project. My students completed several component tasks before turning in their final digital exhibits. Several weeks into the semester, they submitted a short statement outlining the “big idea” behind their exhibitions. The “big idea statement,” a concept I borrowed from museum consultant Beverly Serrell, explained the theme, story, or argument that defined the exhibition’s tone and dictated its content. I asked students to think of the “big idea statement” as the thesis for their exhibition.

Students then used the big idea to guide them as they chose one artifact and drafted a 200-word label for it. I looked for artifact labels that were clearly connected to the student’s big idea statement, included the context visitors would need to know to understand the artifact, and presented the student’s original interpretation of the artifact. The brevity of the assignment gave me time to provide each student with extensive written comments. In these comments and in conversations during office hours, I helped students narrow their topics, posed questions to help guide analysis and interpretation of artifacts, and suggested additional revisions focused on writing mechanics and tone.

Later in the semester, students expanded their big idea statements into rough drafts of the introductions for their digital exhibit. I asked that each introduction orient viewers to the exhibition, outline necessary historical context, and set the tone for the online visit. I also set aside part of a class period for a peer review exercise involving these drafts. I hoped that their classmates’ comments, along with my own, would help students revise their introductions before they submitted their final exhibit.

If I assigned this project again, I would probably ask students to turn in another label for a second artifact. This additional assignment would allow me to give each student more individualized feedback and would help to further clarify my grading criteria before the final project due date.

When you first taught this course a few years ago, you assigned students a more traditional task—a research paper. Can you explain why you decided to change the final assignment this time around?

I wanted to try a more flexible and creative assignment that would push students to develop research and analytical skills in a different format. The exhibit project allows students to showcase their own interpretation of a theme, put together a compelling historical narrative, and advance an argument. The project remains analytically rigorous, pushing students to think about how history is constructed. Each exhibit makes a claim—there is reasoning behind each choice the student makes when building the exhibit and each question he or she asks of the artifacts included. The format encourages students to focus on their visual analysis skills, which tend to get sidelined in favor of textual interpretation in most of the student research papers I have read. Additionally, the exhibit assignment asks students to write for a broader audience, emphasizing clarity and brevity in their written work.

What challenges did you encounter while designing this assignment from scratch?  

In the past I have faced certain risks whenever I have designed a new assignment. First, I have found it difficult to strike a balance between clearly stating expectations for student work while also leaving room for students to be creative. Finding that balance was even harder with a non-traditional assignment. I knew that many of my students would not have encountered an exhibit project before my course, so I needed to clarify the utility of the project and my expectations for their submissions.

Second, I never expected to go down such a long research rabbit hole when creating the assignment directions. I naively assumed that it would be fairly simple to put together an assignment sheet outlining the requirements for the virtual museum project.  I quickly learned, however, that it was difficult to describe exactly what I expected from students without diving into museum studies literature and scholarship on teaching and learning.

I also needed to find a digital platform for student projects. Did I want student projects to be accessible to the public? How much time was I willing to invest in teaching students how to navigate a program or platform? After discussing my options with Reid Sczerba in the Center for Educational Resources (CER), I eventually settled on Reveal, a Hopkins-exclusive image-annotation program. The program would keep student projects private, foreground written work, and allow for creative organization of artifacts within the digital exhibits. Additionally, I needed to determine the criteria for the written component of the assignment. I gave myself a crash course in museum writing, scouring teaching blogs, museum websites, journals on exhibition theory and practice, and books on curation for the right language for the assignment sheet. I spoke with Chesney Medical Archives Curator Natalie Elder about exhibit design and conceptualization. My research helped me understand the kind of writing I was looking for, identify models for students, and ultimately create my own exhibit to share with them.

Given all the work that this design process entailed, do you have any advice for other teachers who are thinking about trying something similar?

This experience pushed me to think about structuring assignments beyond the research paper for future courses. Instructors need to make sure that students understand the requirements for the project, develop clear standards for grading, and prepare themselves mentally for the possibility that the assignment could crash and burn. Personally, I like taking risks when I teach—coming up with new activities for each class session and adjusting in the moment should these activities fall flat—but developing a semester-long project from scratch was a big gamble.

How would you describe the students’ responses to the project? How did they react to the requirements and how do you think the final projects turned out?

I think that many students ended up enjoying the project, but responses varied at first. Students expressed frustration with the technology, saying they were not computer-savvy and were worried about having to learn a new program. I tried to reassure these students by outing myself as a millennial, promising half-jokingly that if I could learn to use it, they would find it a cinch. Unfortunately, I noticed that many students found the technology somewhat confusing despite the tutorial I delivered in class. After reading through student evaluations, I also realized that I should have weighted the final digital exhibit and presentation less heavily and included additional scaffolded assignments to minimize the end-of-semester crunch.

Despite these challenges, I was really impressed with the outcome. While clicking through the online exhibits, I could often imagine the artifacts and text set up in a physical museum space. Many students composed engaging label text, keeping their writing accessible to their imaginary museum visitors while still delivering a sophisticated interpretation of each artifact. In some cases, I found myself wishing students had prioritized deeper analysis over background information in their labels; if I assigned this project again, I would emphasize that aspect.

I learned a lot about what it means to support students through an unfamiliar semester-long project, and I’m glad they were willing to take on the challenge. I found that students appreciated the flexibility of the guidelines and the room this left for creativity. One student wrote that the project was “unique and fun, but still challenging, and let me pursue something I couldn’t have if we were just assigned a normal paper.”

If you’re interested in pursuing a project like this one and have more questions for Morgan, you can contact her at: morganjshahan@gmail.com. 

For other questions or help developing new assessments to use in your courses, contact the Center for Educational Resources (cerweb@jhu.edu).

Allon Brann, Teacher Support Specialist
Center for Educational Resources

Image Source: Morgan Shahan

Classics Research Lab: The John Addington Symonds Project

This past spring, the Classics Department launched the Classics Research Lab (CRL). Within each CRL iteration, students conduct empirical research with faculty, contributing to a larger, ongoing project. Although the research takes place under the umbrella of a course, it is the larger project that dictates the course’s scope and even duration—extending, if needed, across multiple semesters. The initiative is similar, in some ways, to a traditional science lab course in which students carry out set experiments to learn disciplinary content and skills. But it differs in that CRL research is open-ended and discovery-based; assisting faculty with an authentic research project, students make new observations and original interpretations of the data under consideration. The guiding principle of the CRL is that undergraduate students should have the opportunity to experience the real, hands-on work of the humanities: to engage in the active questions that humanist scholars pursue, to recognize the historical and current stakes of those questions, and to add their labor, as increasingly competent collaborators, to the quest for answers through careful, detailed, discipline-specific research.

A second aim of the CRL is to counter prevailing myths about humanities research by making it more visible and accessible to non-specialists. Accordingly, CRL participants meet and work in a public lab space—a room in Gilman Hall that looks out onto the atrium. CRL work-in-progress is visible through the windows of the Lab as well as online, via the websites built by individual projects. (See, for example, https://symondsproject.org/.)

The pilot CRL project, co-taught by Shane Butler of the Classics Department and Gabrielle Dean of the Sheridan Libraries, focused on John Addington Symonds, a Victorian scholar who wrote a groundbreaking work on Ancient Greek sexuality, A Problem in Greek Ethics. In its first semester, the John Addington Symonds Project (JASP) produced outcomes that not only contribute to a richer narrative about the history of sexuality, showing how Symonds painstakingly built his innovative arguments, but also provide future researchers with a new set of tools. Along the way, students acquired key skills in bibliography, archival and rare book research, and digital humanities.

The discovery-based ethos of the course required some significant departures from the usual pedagogical protocols. In place of a fixed syllabus, with all assignments configured and described in advance, the instructors developed a semi-structured syllabus with readings and preparatory assignments in the first half of the semester and a more open schedule in the second half of the semester. The goal was to empower students to help guide the project’s directions based on what they learned.

The semester started with a collaborative assignment designed to orient students to the topic and to the basic tasks of humanities research. Using Zotero, an open-source, digital reference management platform, students collectively assembled the Sheridan Libraries’ catalog records of books by Symonds. The books were then checked out to the Lab and shelved in its secure, dedicated space, so that students could work with them over the semester. Students also visited the Libraries’ special collections to study rare, non-circulating books. This initial assignment introduced students from a range of disciplines to library resources and humanities research processes, while offering a broad overview of Symonds’ writings and range of interests. At the same time, students read and discussed Symonds’ autobiography and signature works in the history of sexuality to ground them in the topic. And they began their independent investigations of books written and read by Symonds. Using the materials checked out to the Lab and in special collections, students composed short blog-style essays documenting the physical features of these books, relating the books to Symonds’ letters and other writings, and construing from their observations new analyses of Symonds’ bibliographic and social networks. These blog posts, after undergoing peer review and instructor review, have been published on the project website. (https://symondsproject.org/blog/)

The second collaborative project undertaken by JASP was an “index locorum” to A Problem in Greek Ethics—a detailed index of citations. Using digital resources and reference books checked out to the Lab, students retraced Symonds’ own research to identify the specific texts he used in the composition of this seminal essay. This brand-new index makes it startingly clear how Symonds connected a breadth of Greek and Latin sources, integrated works by later writers, and from these foundations drew original conclusions about the evolution of same-sex love, eroticism, and social norms and ideas about gender and sexuality in the ancient Greek and Roman worlds—as well as the legacy of these practices and philosophies. The index locorum, which is still in progress, is published on the JASP website.  (https://symondsproject.org/greek-ethics-index/)

The index brought to the Project’s attention an important gap in Symonds scholarship: the absence of reliable digital editions of some versions of A Problem in Greek Ethics, which has a complicated publication history because of censorship and the practices that publishers undertook to evade it. In keeping with the CRL’s dedication to collaborative leadership, JASP participants decided to dedicate the second half of the semester to two linked endeavors.

Students also contributed to the visibility and ongoing viability of the lab through two “meta-lab” ventures: a video (still in development) about JASP, using footage captured throughout the semester via a camera set-up and workflow established by Reid Sczerba of the CER, and a manual documenting the Project’s research processes, to be used by future students. Finally, JASP hosted an “open lab” at the end of the semester with a display of rare books, facsimile photographs, and the physical manifestations of the reconstructed Symonds library, along with the chance to talk with students about their research.While the CRL will continue next semester with the John Addington Symonds Project, it is not constrained to that topic.  Other faculty will offer their own lab courses, sometimes simultaneously in the lab space, to provide students with a variety of opportunities to apply humanities research skills.

Professors Butler and Dean believe the research-based teaching model of the Classics Research Lab is a contemporary implementation of the historic Johns Hopkins model, as the first modern research university in America. The hope is that this curricular model might scale to other disciplines and other universities. For more information, contact Shane Butler (shane.butler@jhu.edu) or Gabrielle Dean (gnodean@jhu.edu).

Dr. Michael J. Reese, Associate Dean and Director
Center for Educational Resources

Image Source: Gabrielle Dean, Reid Sczerba

The New Google Sites

We’re always on the lookout for applications that instructors and their students can use to enhance course work. A previous post We Have a Solution for That: Student Presentations, Posters, and Websites (October 6, 2017) mentioned a new version of Google Sites as having potential as a presentation software that allows for easy collaboration among student team members. Today’s post will delve deeper into its possibilities and use. This post is also available in PDF format as part of The Innovative Instructor articles series.

Logo for Google SitesNew Google Sites is an online website creation platform. It doesn’t require web development or design experience to create sites that work well on mobile devices. The New Google Sites application is included with the creation tools offered in Google Drive, making it easier to share and integrate your Google Drive content.

In 2006 Google purchased JotSpot, a software company that had been creating social software for businesses. The software acquired from that purchase was used to create the first iteration of Google Sites, now known as Classic Google Sites. Ten years later, Google launched a completely rebuilt Google Sites, which is currently being referred to as New Google Sites.

New Google Sites hasn’t replaced Classic Google Sites so much as it offers a new and different experience. The focus of New Google Sites is to increase collaboration for all team members regardless of their web development experience. It is also integrated with Google Drive so that teams working within the Google apps environment can easily associate shared content.

This new iteration of Google Sites is designed with mobile devices in mind. Users are

Screenshot example of the New Google Sites editing interface.

Example of the New Google Sites editing interface.

not able to add special APIs (Application Programmable Interface, which extends functionality of an application) or edit HTML directly. This keeps the editing interface

and options simple to ensure that whatever you create will work consistently across all browsers and devices. While this may seem limiting, you still have the option to use Classic Google Sites if you want a higher level of control.

In a classroom setting, instructors are often cautious about assigning students projects that require them to learn new technical skills that aren’t directly relevant to the course content. Instructors must balance the time it will take students to achieve technical competency against the need to ensure that students achieve the course learning goals. With New Google Sites, students can focus on their content without being overwhelmed by the technology.

In addition to ease of use, collaborative features allow students to work in teams and share content. Group assignments can offer students a valuable learning experience by providing opportunities for inclusivity, exposure to diverse viewpoints, accountability through team roles, and improved project outcomes.

New Google Sites makes it easy for the causal user to disseminate new ideas, original research, and self-expression to a public audience. If the website isn’t ready to be open to the world, the site’s editor has the ability to keep it unpublished while still having the option to collaborate or share it with select people. This is an important feature as student work may not be ready for a public audience or there may be intellectual property rights issues that preclude public display.

Professors at here at Johns Hopkins have used New Google Sites for assignments. In the History of Science and Technology course, Man vs. Machine: Resistance to New Technology since the Industrial Revolution, Assistant Professor Joris Mercelis had students use New Google Sites for their final projects. Teams of two or three students were each asked to create a website to display an illustrated essay based on research they had conducted. Images and video were required to support their narrative arguments. Students had to provide proper citations for all materials. Mercelis wanted the students to focus on writing for a lay audience, an exercise that encouraged them to think broadly about the topics they were studying.

History of Art Professor Stephen Campbell used a single Google Site where student teams collaborated to produce an online exhibition, Exhibiting the Renaissance Nude: The Body Exposed. Each student group was responsible for supplying the materials for one of five topic pages. The content developed from this project was accessible only to the class.

In both cases, students reported needing very little assistance when editing their sites. Typically, giving an introductory demonstration and providing resources for where to find help are all students need to begin working.

Recently, Google has created the ability to allow other Google Drive content to be embedded in a site. This means that you can embed a form or a document on a web page to elicit responses/feedback from your audience without them having to leave the site. This level of integration further supports the collaborative nature of Google applications.

Currently, this iteration of Google Sites uses the New in its title. There may come a time when Google will drop the New or re-brand New Google Sites with a different name. There is no indication that Google will stop supporting Classic Google Sites with its more advanced features.

Use of both versions of Google Sites is free and accessible using your Google Account. You can create a new site by signing into Google and going to the New Google Sites page (link provided below). You can also create a site from Google Drive’s “New” button in the creation tools menu.

It is recommended that students create a new account for class work instead of us­ing their personal accounts. While this is an additional step, it ensures that they can keep their personal lives separated from their studies.

A Google Site as displayed on a desktop, tablet, and smartphone.

A Google Site as displayed on a desktop, tablet, and smartphone.

Additional Resources:

Reid Sczerba, Multimedia Developer
Center for Educational Resources

Image sources: Google Sites logo, screenshots

We Have an App for That! SketchUp

SketchUp logo.SketchUp is a three-dimensional rendering application that uses a sketch-based approach for creating models. It may be beneficial to anyone looking to visualize three Screen shot showing the range of items (people, landscaping, buildings, monuments, vehicles, appliances, furnishings) that can be drawn with SketchUp.dimensional structures, spaces, or objects. With a free-to-use version available for download, SketchUp is an affordable way to develop 3D models. It is easy to learn compared to professional 3D graphic software packages.

The application was created in 2000 by @Last Software. Google purchased SketchUp in 2006. Under Google’s ownership, the program was developed further and integrated with Google Earth to allow importing models for geo-location. In 2012, Google sold SketchUp to Trimble Inc., a mapping, navigation, and surveying equipment company. Trimble continues to develop the application and support SketchUp’s growing community of users.

Three-dimensional rendering software is typically complex and requires a significant time investment to learn and use. SketchUp was developed to be intuitive and easy to learn with the intent to bring “3D modeling to the masses.” It was used early on by architectural firms to provide quick concept renderings of buildings and environments. Today, the application is used by interior designers, landscape architects, civil and mechanical engineers, and film and video game creators. There are use cases for the program ranging from exploring building structures, conceptualizing mechanical objects, teaching complex structures, and remodeling houses.

Using your imagination to conceptualize physical spaces is difficult. CommunicatingSketchUp drawing showing a building in ground elevation. ideas and concepts that involve spatial and volumetric relationships in space, such as comparison of size and distance between objects, is often more effectively accomplished by sharing visualizations and renderings of the subject. This allows viewers to have a common point of reference in which to talk about details.

Three-dimensional models offer immersive and engaging aspects that are potentially exciting to viewers. For example, sharing a virtual walkthrough of an ancient city or a 360-degree view of a design prototype can make the experience memorable for your students, which helps them retain the information presented.

Creating three-dimensional models for pedagogical purposes has traditionally required the use of expensive professional modeling applications and highly skilled staff. SketchUp’s free modeling tools make the process of creating models an intuitive experience. This can be a great starting point for faculty to produce three-dimensional models and environments. Moreover, your students may not have developed the ability to think spatially. Assigning a course project that involves the use of SketchUp creates an opportunity for learning these skills.

Screenshot of SketchUp building plan showing extensions and repositories.SketchUp provides accurate tools for the rendering of objects and spaces. As an easy entry point for CAD (Computer Aided Design) software, SketchUp can be used in disciplines that require technical drawings and diagrams. For example, SketchUp can be used to conceptualize urban planning initiatives to think through the impact of proposed changes to a community. Resulting models can be shared with stakeholders complete with walkthrough animations and annotations to provide additional information.

Drawing of a verge and folio mechanism created in SketchUp by Reid Sczerba.

Example diagram of verge and folio mechanism created in SketchUp.

SketchUp can be particularly useful for design projects in engineering disciplines that require the development of prototypes, such as a design project to develop a radio transmitter and receiver within a size specification that could withstand an impact of 100 pounds of force. Team-members could use SketchUp to map out the circuitry for the electrical components and develop the housing. There are methods to use a SketchUp model to create a physical prototype with a 3D printer.

At Hopkins, Bill Leslie, a professor of History of Science and Technology, had in the past required students to build a shoebox diorama of a museum exhibition featuring a topic of their choice. After discovering SketchUp, he offered students the option to create their exhibition space in 3D. The students were unanimous in choosing SketchUp, which improved both the consistency of the projects and the logistics of presenting them to class. Students demonstrated creativity and engagement in the project.

Interest in virtual and augmented reality has increased in recent years. Companies have developed new technologies and methods to offer opportunities for people to experience virtual environments. Universities have been investigating technologies such as Google Cardboard, Oculus Rift, and Microsoft HoloLens. Currently, there is a lack of content available to make use of these emerging technologies. SketchUp could find itself in a position to be a starting point for the creation of 3D spaces that can be experienced in a highly immersive environment.

Trimble offers a free version of the application called SketchUp Make. It includes all of the basic features for modeling. SketchUp Pro is a full featured version that includes features such as solid modeling tools, importing terrain and satellite imagery, dynamic components, and importing and exporting file formats necessary for use in other applications. If you are an educator and plan on teaching with SketchUp, you can request a free one-year license to use the full-featured SketchUp Pro. Students are also able to get a discount on a one-year license with proof of enrollment.

There are video tutorials available for learning SketchUp. These tutorials are often the most efficient way to learn the application and get a quick start on a project.

One of the best resources from the SketchUp community is the 3D Warehouse, an online repository for sharing user-generated models. The models found in the 3D Warehouse can be a starting point for your own projects. There are a number of companies that have uploaded professionally created models of their products so if you are looking for a specific model of say, a household appliance, you may find it there.

SketchUp is highly extendable, giving users the ability to develop plugins with the Ruby programming language. The Extension Warehouse is a repository of plugins you may install in your instance of SketchUp. Not all plugins are free, but if you need to have a photo-realistic polish or find a way to streamline a modeling process, the Extension Warehouse may have the answer.

Additional Resources

This post originally appeared as part of our Innovative Instructor print series in the Technology forum as SketchUp.

Reid Sczerba, Multimedia Development Specialist
Center for Educational Resources

Images sources: Logo and screenshots from SketchUp.com, Verge and Folio digram CC Reid Sczerba.

Considerations for Digital Assignments

Image of the handout on considerations for digital assignments

My colleague in the Center for Educational Resources, Reid Sczerba, and I often consult with faculty who are looking for alternative assignments to the traditional research paper. Examples of such assignments include oral presentations, digital and print poster presentations, virtual exhibitions, using timelines and mapping tools to explore temporal and spatial relationships, blogging, creating videos or podcasts, and building web pages or websites.

Reid, who is a graphic designer and multimedia specialist, put together a handy chart to help faculty think about these assignments in advance of a face-to-face consultation with us. A PDF version of this handout is available for your convenience. The text from the chart is reprinted below.

Learning objectives
♦ Have you determined your learning objectives for this assignment? Deciding what you would like your students to learn or be able to do helps to frame the parameters of your assignment. http://www.cer.jhu.edu/ii/InnovInstruct-BP_learning-objectives.pdf

Type of assignment
♦Will there be analysis and interpretation of a topic or topics to produce a text-based and/or visual-based project? Consider alternatives to a traditional research paper.
http://ii.library.jhu.edu/2016/04/08/lunch-and-learn-alternatives-to-the-research-paper/
♦Will there be a need to document objects or materials for a catalog, exhibition, or repository? Defining meaningful metadata and the characteristics of research materials will be important considerations.

Access and visibility
♦Will you want the students’ work to be made open to the public, seen just at JHU, or shared only with the class? Decide up front whether to have students’ work be public or private in order to get their consent and choose the best platform for access.
♦ Will they be working with copyrighted materials? The fair use section of the Copyright Act may provide some latitude, but not all educational uses are fair use. http://www.arl.org/focus-areas/copyright-ip

Collaboration
♦Will you want students to work collaboratively as a class, in small groups, or individually?
Group work has many benefits but there are challenges for assessment and in ensuring that students do their fair share of the work.
http://www.cer.jhu.edu/ii/InnovInstruct-BP_MakingGroupProjectsWork.pdf
♦ Will you want the students’ work to be visible to others in the class or private to themselves or their group?
Consider adding a peer review component to the assignment to help the students think critically about their work.
http://www.cer.jhu.edu/ii/InnovInstruct-Ped_peerinstruction.pdf

Format
♦ Will you want your students to have a choice of media to express their research or will all students use the same solution?
An open-ended choice of format could allow students to play to their strengths, leading to creativity. On the other hand, too many choices can be daunting for some, and it may be challenging to assess different projects equally.
♦ What would be the ideal presentation of the student’s work?

• spatially arranged content (mapping, exhibition)
• temporally arranged content (timeline)
• narrative (website, blog)
• oral presentation
• visual presentation (poster, video)

Formats for digital assignments are not limited to this list. More than one approach can be used if the result fulfills the learning objectives for the assignment.

Some of the solutions that we have recommended to faculty in the past are OmekaOmeka NeatlineTimeline JSPanopto (JHU), Reveal (JHU), Google tools (Google SitesGoogle Maps, Google Docs), Voicethread (JHU), and WordPress.

*************************************************************************************************

Reid Sczerba, Multimedia Development Specialist
Center for Educational Resources

Macie Hall, Senior Instructional Designer
Center for Educational Resources

Image source: Image of the handout created by Reid Sczerba

Creative Student Assignments: Poster Projects

Looking for a final course project for your students that might give them an authentic learning experience – building skills they can use in their post-college careers? Think about a poster assignment.

For STEM career-path students, poster sessions are certain to be a part of their futures. Increasingly, those in Humanities and Social Sciences are finding that poster sessions are being seen in their professional/academic conferences. Posters and similar presentation approaches are becoming part of business (including non-profit) practice as well.

Student presenting at a poster session.

Credit: NASA/GSFC/Becky Strauss

Poster projects can be designed to foster student research, writing, and presentation skills as well as pushing them to think visually. If having students print out their final product for presentation is too costly and/or space for a poster session is limited, students can present electronically. In fact, the easiest way to create a poster is to use a size-customized (e.g., 48”x36”) PowerPoint or Keynote slide, so presenting on a large screen to a class is feasible and cost effective.

You will want to provide students with specific objectives as well as concrete instructions, and, preferably, a few checkpoint deadlines along the way. Fortunately there are many online resources and guides for poster creators.  Here are three (if you have other sources, please share in the comments section):

SUNY at Buffalo Libraries – Designing Effective Posters
A collaborative effort hosted at NCSU: Creating Effective Poster Presentations
This one combines short videos and text in an introduction to Poster Design, especially good for layout and design elements.

There are many more, as well as YouTube and Vimeo video tutorials.

First time poster creators tend to err on the side of having too much text, so you should give your students some specific guidelines.  These, for example, can be adapted according to your pedagogical goals and academic discipline:

Title = 1-2 short lines
Abstract (if required) = ~50 words
Introduction = ~200 words
Materials/methods = ~200 words
Results = ~200 words
Conclusion = ~100 words
Other sections (footnotes, acknowledgements, sponsors) = ~50 words
TOTAL < 800 words

A total word count of 800 is may be difficult to achieve, but getting as close to that as possible will keep the content concise and focused. It will also leave more room for images and diagrams, the elements that will be most attractive to viewers in a crowded poster session.

You will want your students to think about using consistent design elements (layout, font, color, images, and data display) so that their visual language is both unique and subject-appropriate. This attention to consistent design will also set them apart from other displays. Looking at examples of posters in class and having your students discuss what is effective and what is not can be a good way to get students thinking visually. Use Google Images  to search for “examples of scientific posters” or “examples of humanities posters” or examples in your specific discipline to start the conversation.

Macie Hall, Senior Instructional Designer
Center for Educational Resources

Reid Sczerba, Multimedia Developer
Center for Educational Resources


Image Source: Credit: NASA/GSFC/Becky Strauss
http://www.flickr.com/photos/nasa_goddard/7651333914/in/set-72157630763357278

These are a few of our favorite… apps!

Faculty often ask CER staff about our favorite smart phone apps. There are many categories of apps including entertainment, games, books, lifestyle, productivity, communication, collaboration, news, shopping, social, and education. This post will focus on apps that can enrich the teaching experience or help instructors with their daily work flow.

Control
Apps like “Gmote” for Android and “Touch Mouse” for iOS allow you to control a computer’s cursor from across the room using your smart phone. This can un-tether instructors or presenters from podiums and allow them to walk about freely while controlling their presentations. The “Crestron Mobile for iOS”  and “Crestron Mobile for Android” apps allow these devices to control lights, media, climate and projector controls remotely in any of the “smart” classrooms at JHU. Contact IT@JH for information on using this app in specific classrooms on the JHU Homewood campus.

File Management
Android has a convenient app for managing the files on your device: “ES File Explorer.” With it you can move, copy, rename, make folders, and even unzip compressed packages. It also comes with a simple text/image viewer to give you a better sense of the content of a file.

File Transfer
When you need to make files available for multiple people to view later or on a different computer, “Dropbox” for iOS and Android lets you store your files “in the cloud” for sharing. Using “SkyDrive” with your Windows Phone affords a similar ever-present file repository.

Note Taking
Simplenote” and “Evernote” are very popular, easy to use programs that let you
take notes, tag them, and sync them with your computer from an iOS device. The
latter has more features, such as storing audio, images, and maps, and it is available
for both Android and WP7.5. WP7.5 also comes with “OneNote Mobile,” which
gives you more features than the basic note taking app.

 Photography
One of the most useful aspects of a smart phone is the ability to take photos. Each
device comes with basic camera functionality, but apps like “Camera Zoom FX” for Android and “Camera+” for iOS will give you control of the camera’s settings, increase the chances you’ll take a good photo, and support post-production editing/enhancing of the photos. “Thumba Photo Editor” for WP7.5 also allows you to extend your post-production editing options and edit GPS data. If a single photo doesn’t do your location justice, apps like “360 Panorama” and “PhotoSynth” for iOS and WP7.5 can stitch photos together for a panoramic experience.

Reader
The portability of a smart phone makes it easier to bring your normally heavy
reading material with you wherever you go. Apps like “Instapaper” and “Pocket” (formerly Read It Later) for iOS and Android allow you to save, sort, and share webpages with or
without images for reading anytime, even if you don’t have a cellphone signal or
wireless internet connection. The “GoodReader” app for iOS is a robust reader
that allows you to render just about any file, annotate PDFs, view videos and share
what you’ve read with others. The “Kindle” app is available for every device; it
allows you to sync and read all your purchased Amazon e-books.

Reference
With information at your fingertips anytime, reference apps like “Merriam-
Webster’s Dictionary” for iOS and Android will ensure you are never at a loss for
words. And when your reference material needs to be translated to different languages,
“Google Translate,” also for iOS and Android, allows you to write or speak words
for translation to over 20 different languages. “Wolfram Alpha,” another great reference
app available for iOS and Android, gives you robust answers to technical questions.

Task Management
Everyday tasks can be managed through your smart phone using apps like
Remember the Milk” on an iOS or Android device; Windows Phone has a task
manager built in. Staying on schedule is made easier by the app’s ability to sort,
send notifications, and sync with your computer.

Where to get apps
Online app stores are available for each device operating system:

Reid Sczerba, Multimedia Developer
Center for Educational Resources


Image source: © Reid Sczerba