We Have a Solution for That: Student Presentations, Posters, and Websites

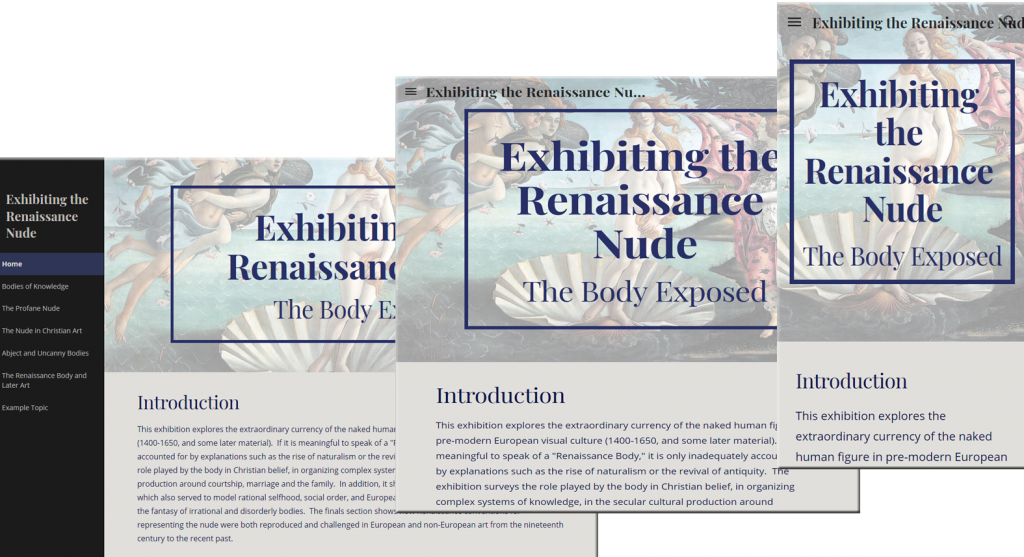
Some of our faculty are moving away from traditional end-of-semester assessments, such as term papers and high-stakes final exams, in favor of projects that can be scaffolded over a period of time. These may include having students share their research in an oral presentation, poster, or website. The question is, how do you support their research output? Fortunately, we have some solutions!

If your students are doing either oral presentations or electronic posters, check out Prezi Next, the new version of the online presentation application. [See our post on the original version, The Power of Prezi, from October 2014.] The new version, which runs on HTML5 rather than Adobe Flash, offers many more templates, a more intuitive interface, supports more file types, and is easier to navigate while presenting. While Prezi is great for a linear presentation, one advantage is that presentations can be designed to be non-linear, useful for facilitating a less formal discussion for example.

Looking for a presentation software that allows for easy collaboration among student team members? Check out Google Slides. Like Google Docs and Google Sheets, access to the slides can be shared and multiple users can work on the sides remotely and simultaneously—there’s even a chat feature to make group editing easy. There are some nicely designed templates, themes in Google-speak, and you can easily integrate content from Google spread sheets and documents. There is also a downloadable version of Google Slides for desktop use.

If you don’t like the templates in PowerPoint or Google Slides, check out Slides Carnival, which has many creative templates available for download, including fonts, icon sets, maps, and charts, graphs, and tables styled for each template. These work with both PowerPoint and Google Slides.

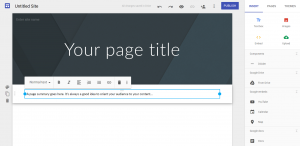
If you are looking to have your students create a website, Google Sites has recently come out with a new version of its website creation application. When you sign into Google Sites you can choose to use the classic version or the new one. The new version gives you fewer options (just six themes available currently), but is a snap to use, being essentially drag and drop. There no messing with HTML code, and it is easy to tie into the content from your other Google apps. There is an “add editors” feature that will facilitate group work. It’s a great option when you want your students to be focused on creating content, not on struggling with technology.

We also have some resources for students doing presentations and posters—online videos on creating and designing effective PowerPoint presentations and posters, as well as some handouts on these topics. See Presentation Strategies on the CER website. If your students (or you) are looking for freely-available and rights-free visual resources (images and multimedia) check out CER’s Visual Resources page.

Macie Hall, Senior Instructional Designer
Center for Educational Resources

Image Source: cc Wikimedia Commons

We Have an App for That! SketchUp

SketchUp logo.SketchUp is a three-dimensional rendering application that uses a sketch-based approach for creating models. It may be beneficial to anyone looking to visualize three Screen shot showing the range of items (people, landscaping, buildings, monuments, vehicles, appliances, furnishings) that can be drawn with SketchUp.dimensional structures, spaces, or objects. With a free-to-use version available for download, SketchUp is an affordable way to develop 3D models. It is easy to learn compared to professional 3D graphic software packages.

The application was created in 2000 by @Last Software. Google purchased SketchUp in 2006. Under Google’s ownership, the program was developed further and integrated with Google Earth to allow importing models for geo-location. In 2012, Google sold SketchUp to Trimble Inc., a mapping, navigation, and surveying equipment company. Trimble continues to develop the application and support SketchUp’s growing community of users.

Three-dimensional rendering software is typically complex and requires a significant time investment to learn and use. SketchUp was developed to be intuitive and easy to learn with the intent to bring “3D modeling to the masses.” It was used early on by architectural firms to provide quick concept renderings of buildings and environments. Today, the application is used by interior designers, landscape architects, civil and mechanical engineers, and film and video game creators. There are use cases for the program ranging from exploring building structures, conceptualizing mechanical objects, teaching complex structures, and remodeling houses.

Using your imagination to conceptualize physical spaces is difficult. CommunicatingSketchUp drawing showing a building in ground elevation. ideas and concepts that involve spatial and volumetric relationships in space, such as comparison of size and distance between objects, is often more effectively accomplished by sharing visualizations and renderings of the subject. This allows viewers to have a common point of reference in which to talk about details.

Three-dimensional models offer immersive and engaging aspects that are potentially exciting to viewers. For example, sharing a virtual walkthrough of an ancient city or a 360-degree view of a design prototype can make the experience memorable for your students, which helps them retain the information presented.

Creating three-dimensional models for pedagogical purposes has traditionally required the use of expensive professional modeling applications and highly skilled staff. SketchUp’s free modeling tools make the process of creating models an intuitive experience. This can be a great starting point for faculty to produce three-dimensional models and environments. Moreover, your students may not have developed the ability to think spatially. Assigning a course project that involves the use of SketchUp creates an opportunity for learning these skills.

Screenshot of SketchUp building plan showing extensions and repositories.SketchUp provides accurate tools for the rendering of objects and spaces. As an easy entry point for CAD (Computer Aided Design) software, SketchUp can be used in disciplines that require technical drawings and diagrams. For example, SketchUp can be used to conceptualize urban planning initiatives to think through the impact of proposed changes to a community. Resulting models can be shared with stakeholders complete with walkthrough animations and annotations to provide additional information.

Drawing of a verge and folio mechanism created in SketchUp by Reid Sczerba.

Example diagram of verge and folio mechanism created in SketchUp.

SketchUp can be particularly useful for design projects in engineering disciplines that require the development of prototypes, such as a design project to develop a radio transmitter and receiver within a size specification that could withstand an impact of 100 pounds of force. Team-members could use SketchUp to map out the circuitry for the electrical components and develop the housing. There are methods to use a SketchUp model to create a physical prototype with a 3D printer.

At Hopkins, Bill Leslie, a professor of History of Science and Technology, had in the past required students to build a shoebox diorama of a museum exhibition featuring a topic of their choice. After discovering SketchUp, he offered students the option to create their exhibition space in 3D. The students were unanimous in choosing SketchUp, which improved both the consistency of the projects and the logistics of presenting them to class. Students demonstrated creativity and engagement in the project.

Interest in virtual and augmented reality has increased in recent years. Companies have developed new technologies and methods to offer opportunities for people to experience virtual environments. Universities have been investigating technologies such as Google Cardboard, Oculus Rift, and Microsoft HoloLens. Currently, there is a lack of content available to make use of these emerging technologies. SketchUp could find itself in a position to be a starting point for the creation of 3D spaces that can be experienced in a highly immersive environment.

Trimble offers a free version of the application called SketchUp Make. It includes all of the basic features for modeling. SketchUp Pro is a full featured version that includes features such as solid modeling tools, importing terrain and satellite imagery, dynamic components, and importing and exporting file formats necessary for use in other applications. If you are an educator and plan on teaching with SketchUp, you can request a free one-year license to use the full-featured SketchUp Pro. Students are also able to get a discount on a one-year license with proof of enrollment.

There are video tutorials available for learning SketchUp. These tutorials are often the most efficient way to learn the application and get a quick start on a project.

One of the best resources from the SketchUp community is the 3D Warehouse, an online repository for sharing user-generated models. The models found in the 3D Warehouse can be a starting point for your own projects. There are a number of companies that have uploaded professionally created models of their products so if you are looking for a specific model of say, a household appliance, you may find it there.

SketchUp is highly extendable, giving users the ability to develop plugins with the Ruby programming language. The Extension Warehouse is a repository of plugins you may install in your instance of SketchUp. Not all plugins are free, but if you need to have a photo-realistic polish or find a way to streamline a modeling process, the Extension Warehouse may have the answer.

Additional Resources

This post originally appeared as part of our Innovative Instructor print series in the Technology forum as SketchUp.

Reid Sczerba, Multimedia Development Specialist
Center for Educational Resources

Images sources: Logo and screenshots from SketchUp.com, Verge and Folio digram CC Reid Sczerba.

Considering the Use of Turnitin

Earlier this week an article from Inside Higher Ed (IHE) caught my eye. Sign with hand and text reading prevent plagiarism. In New Salvo Against Turnitin (June 19, 2017) Nick Roll summarizes an essay by Sean Michael Morris, Instructional Designer in the Office of Digital Learning at Middlebury College, and Jesse Stommel, Executive Director, Division of Teaching and Learning Technologies at the University of Mary Washington. The essay authors argue that faculty should rethink the use of Turnitin, questioning not only “…the control and use of people’s data by corporations…” but “…Turnitin’s entire business model, as well as the effects on academia brought on by its widespread popularity.” Morris and Stommel further contend that those using Turnitin “supplant good teaching with the use of inferior technology” reducing the student-instructor relationship to one where suspicion and mistrust are at the forefront. [Turnitin is a software application used to detect plagiarism, and Morris and Stommel are not the first to decry the company’s business model and practices.]

Although the IHE article provides a fair summary, as well as additional comments by Morris and Stommel, it is worth reading the 3,928 word essay—A Guide for Resisting Edtech: The Case Against Turnitin (Digital Pedagogy Lab, June 15, 2017)—to appreciate the complex argument. I agree with some of the concerns the authors address and feel we should be doing more individually and collectively to school ourselves and our students in the critical evaluation of digital tools, but disagree with what I feel are over-simplifications and unfair assumptions. Morris and Stommel cast faculty who use Turnitin as “surrendering efficiency over complication” by not taking the time and effort to use plagiarism as a teachable moment. Further, they state that Turnitin takes advantage of faculty who are characterized as being, at the core, mistrustful of students.

The assumption that faculty using Turnitin are not actively engaging in conversations around and instruction of ethical behavior, including plagiarism, and are not using other tools and resources in these activities is simply not correct. The assertion that faculty using Turnitin are suspicious teachers who are embracing an easy out via an efficient educational technology is also not accurate.

The reality is that some students will plagiarize, intentionally or not, and the Internet, social media practices, and cultural differences have rendered complicated students’ understanding of intellectual property. I believe that many of our institutions of higher learning, and faculty and library staff therein, make concerted efforts to teach students about academic integrity. This includes the meaning and value of intellectual property, as well as finer points of what constitutes plagiarism and strategies to avoid it.

I believe it is relevant to note that Middlebury College’s website boasts a mean class size of 16, while the University of Mary Washington lists an average class size of 19. Student-faculty ratios are 8 to1 and 14 to 1 respectively.  I cannot help but feel that Morris and Stommel are speaking from a point of privilege working in these two institutions. Instructors who teach at large, underfunded, state universities with classes of hundreds of students, relying on a corps of teaching assistants to grade their essays, are in a different boat.

The authors state: “So, if you’re not worried about paying Turnitin to traffic your students’ intellectual property, and you’re not worried about how the company has glossed a complicated pedagogical issue to offer a simple solution, you might worry about how Turnitin reinforces the divide between teachers and students, short-circuiting the human tools we have to cross that divide.” In fact, we may all be worried about Turnitin’s business model and be seeking a better solution. Yet in this essay nothing more concrete is given us on those human tools and how faculty in less privileged circumstances can realistically and effectively make use of them.

The Innovative Instructor has in the past posted on Teaching Your Students to Avoid Plagiarism (November 5, 2012, Macie Hall), and using Turnitin as a teaching tool: Plagiarism Detection: Moving from “Gotcha” to Teachable Moment (October 9, 2013, Brian Cole and Macie Hall). These articles may be helpful for faculty struggling with the issues at hand.

Yes, we should all be critical thinkers about the pedagogical tools we use; in the real world, sometimes we face hard choices and must fall back on less than ideal solutions.

Macie Hall, Senior Instructional Designer
Center for Educational Resources

Image source: Microsoft Clip Art edited by Macie Hall

Snow Day? How to Keep Your Classes Going Even When Life Doesn’t Cooperate

Dog sled shown in a snow-covered landscape with mountains in the background.Winter here in Baltimore brings the specter of freak snowstorms dropping two feet of the white stuff on our campus and shutting the city down for a week. Missing two or three class sessions can push your course syllabus into the realm of unrecoverable. Even if you live in more tropical climes, there is always a critical conference, a virulent virus, or other unplanned absence-causer lurking. The good news is that with a little thinking ahead, you can keep your classes going virtually whether or not you are present in reality.

Staff in the Center for Educational Resources prepared a handy guide for weather-related emergencies: Options for Continuing Instruction. While the guide is specific to Johns Hopkins tools, resources and applications, it is adaptable to other circumstances. The suggestions will be even easier to implement if you take some time to plan ahead.

Some of the suggestions recommend the use of Blackboard, the JHU learning management system. Readers from outside of Hopkins can substitute your institution’s LMS. Even if you don’t use the LMS regularly it is a good idea to have a course shell ready to go for an emergency situation. At JHU all courses have a Blackboard shell ready to be activated by the instructor. Here is general help with Blackboard if you are a new user or need a refresher.

First and foremost, it is important to have a way to contact all of your students. JHU Faculty can do this through Blackboard or our Student Information System (SIS). In any case, letting your students know how to proceed in an unplanned absence will be critical to your success. It’s also crucial to let your students know your expectations for assignments and other course modifications made during the closure or your absence.

You can share course materials with students using your LMS, or through a file sharing system such as DropBox. JHU faculty have JHBox freely available for their use. Students can submit assignments by email or through the LMS.

Replacing actual time in the lecture hall or classroom can be more challenging, but is doable. For a smaller class or seminar where discussion is the norm, you can conduct asynchronous discussions using a threaded discussion application. Blackboard has one as a built in feature (see here for help setting this up and here for tips on implementation). Voicethread (here for JHU, here for others), which at JHU is integrated with Blackboard, is another option. A wiki application, such as Google Sites, could be adapted for use as an online discussion tool. Teleconferencing is also an option for smaller classes. IT@JH provides instructions on live teleconferencing options. Skype could also be used for live discussion.

 There are applications, such as Adobe Connect (available here for use by JHU faculty) that will allow you to conduct a live, synchronous lecture and record it for students to watch later. Panopto is another JHU resource for recording a video lecture that can be posted to your Blackboard course site for students to watch on their own schedule. If you don’t have access to these applications, it is possible to create a PowerPoint presentation and do a voice recording over the slides to send to your students. Even lower-tech and easier, put your lecture script in the notes section of the slides instead of voice recording.

The purpose of these solutions is to keep your students and course content delivery from falling irretrievably behind. Having a plan in place ahead of time, figuring out the options that will work best for your course, learning how to use the relevant applications, and alerting your students to the possibilities, will save you time and headaches when the snow starts falling.

Macie Hall, Senior Instructional Designer
Center for Educational Resources

Image Source: Pixabay.com

Consider the OER (Open Educational Resource)

I should first disclose that I am not a longstanding, seasoned user of online strategies in my pedagogy. In fact, aside from very basic use such as posting images online for my students to review, my first real foray into systematic, thought-through online pedagogical strategies began in the summer of 2015.

A stitched image showing the Ishtar gate of Babylon in full view. Pergamon Museum, Berlin.In my discipline, specifically the study of Mesopotamian art but more broadly art history, I see two somewhat different audiences for online resources: 1) students (or student-like users) looking for content about art history; and 2) educators looking for pedagogical support/sharing related to the teaching of art history.

With respect to online resources for student-like users, two main trends in online pedagogy are apparent: 1) how to recreate and/or enhance the kind of activities that take place in face-to-face teaching; 2) how to add to, that is do something different, from the kind of activities that take place in face-to-face teaching.

My own foray into online pedagogy was primarily aimed at student-like users, although a secondary audience of other educators is also relevant because of the open-access nature of my project.

The arts of Mesopotamia – the “land between the rivers” in what is today Iraq and Syria – represent some of the earliest complex artworks dating back to 3500. Works from intricately carved seals to sculpture offer a wealth of arts that inform on the social, political, economic, and religious spheres of multiple ancient cultures, including Sumer, Babylonia, and Assyria. The cultural heritage of Mesopotamia is particularly threatened at the moment due to the current political situation in Iraq and Syria.

Teaching this material at the undergraduate level, however, is a challenge as there is no reliable, up-to-date textbook available; the most recent usable textbook dates to 1954 (H. Frankfort, Art and Architecture of the Ancient Orient). Publication of a traditional, hard-copy textbook now is considered financially impractical.

In the spring of 2015, pursuing a Technology Fellows grant from the CER, I proposed a solution: to create on-line modules to be used in teaching my course Palaces, Temples and Tombs in Mesopotamia in fall 2015. These modules are designed as Open Education Resources (OER) using a pre-existing Internet platform, OpenStax CNX, hosted through Rice University, which promotes the production of small “knowledge chunks” in an open license venue. Materials for the modules consist of freely available content and content created by me and my graduate student fellows, Megan Lewis and Avary Taylor.

What is an OER? From the William and Flora Hewlett Foundation “Open Educational Resources are teaching, learning, and research resources that reside in the public domain or have been released under an intellectual property license that permits their free use and repurposing by others. OER include full courses, course materials, modules, textbooks, streaming videos, tests, software, and any other tools, materials, or techniques used to support access to knowledge.”

OER modules of instruction permit multi-media and non-traditional formats for conveying information, including virtual reconstructions and walk-throughs, videos, and hyperlinking in addition to providing up-to-date informational entries for the ancient artworks. For my course, I envisioned these modules as a means of engaging students before actual face time in the classroom in order to concentrate on discussion and exploration of the complex conceptual aspects of Mesopotamian art and culture during class time.

Over the 6-month period of the fellowship, five different modules were created and posted to the website at OpenStax CNX. They were an enormous asset to the class, because they provided background information and discussion points that were up-to-date in their content and specifically formulated to align with my class lectures and discussion. The modules also included helpful videos and virtual reconstructions of the ancient art that provided a fuller understanding for the students.

The online modules were evaluated through an online survey, developed with the aid of CER, and available to the students through JHU’s Blackboard (learning management system). All 12 students completed the anonymous survey, which consisted of 5 questions. 83.3% of the respondents said the modules were “very successful” in providing information related to the course content, while the remaining 16.7% said they were “somewhat successful.” The responses to the other questions were also generally quite positive, with appreciation for the multimedia components and for the fact that the modules aligned well with the lectures. Respondents found least useful about the modules some formatting issues inherent in the platform we used, and a few noted that they were slow to download.

Beyond the student reactions, I have had positive responses from colleagues in the field who expressed gratitude for making freely accessible materials on Mesopotamian art available.

The one downside for me was that the OERs did not necessarily promote a higher level of discussion as I had hoped; the modules were still too close to a textbook in terms of how students interacted with the materials

There were a few issues that we faced in developing the content, one of which was copyright.  We had to rely on what was freely available online and that sometimes meant using videos that contained inaccurate material. We also had to work with the OpenStax CNX version of an html coding program that made certain things difficult to manipulate and constrained format in terms of relationship of image to text.

These drawbacks did not discourage me from using OERs. In spring 2016, I received an additional grant through the CER’s Technology Fellows program to produce more modules for my teaching with the assistance of graduate student fellows Megan Lewis and Avary Taylor.

The modules can be accessed through various search mechanisms on the OpenStax CNX website, including through the authors’ names: Marian Feldman, Megan Lewis, and Avary Taylor. They are:

  1. Cylinder Seals and the Development of Writing in Early Mesopotamia http://cnx.org/contents/863d1f28-bad9-42ab-a74c-c602256f9908@1/Cylinder-Seals-and-the-Develop
  2. Ur III: Continuity and Erasure http://cnx.org/contents/30f1bbbc-6341-4e2a-8d2a-53600a36a30d@1/Ur-III-Continuity-and-Erasure
  3. Late Bronze Age Internationalism and the International Artistic Style http://cnx.org/contents/98680d11-2374-4a98-aa91-d2708e2beff1@3/Late-Bronze-Age-Internationali
  4. Neo-Assyrian Palace Reliefs of Kings Tiglath-Pileser III and Sargon II http://cnx.org/contents/299a9d11-5c05-49c8-9844-6f042208b15c@1/Neo-Assyrian-Palace-Reliefs-of
  5. The Ancient City of Babylon http://cnx.org/contents/d49e45c8-931e-4dfd-a3e3-1d0dc0008d55@1/The-Ancient-City-of-Babylon
  6. Mesopotamian Votive Statuary from the Early Dynastic Period https://cnx.org/contents/k64PgmY0@1/Mesopotamian-Votive-Statuary-f
  7. Mesopotamian Cosmology and Mythology https://cnx.org/contents/OCYI18Df@1/Mesopotamian-Cosmology-and-Myt
  8. The Development of Sumerian Temple Architecture in Early Mesopotamia https://cnx.org/contents/Yip68Fa2@7/The-Development-of-Sumerian-Te
  9. Sargon the Great and the Charismatic Rulers of Ancient Akkad of Mesopotamia https://cnx.org/contents/4LSqiUv0@2/Sargon-the-Great-and-the-Chari
  10. The Babylonian Map of the World: A Portrayal of Mytho-Historic Reality https://cnx.org/contents/yM0T6acv@2/The-Babylonian-Map-of-the-Worl
  11. The ‘Victory Stele’ of Naram-Sin of Akkad and the Development of the Public Monument in Ancient Mesopotamia https://cnx.org/contents/YUbLWN2X@1/The-Victory-Stele-of-Naram-Sin

Marian Feldman, Professor, Departments of the History of Art and Near Eastern Studies, Johns Hopkins University

Image Source: A stitched image showing the Ishtar gate of Babylon in full view. Pergamon Museum, Berlin. Photo CC Radomir Vrbovsky, Wikimedia Commons.


Making Maps Making Connections

Using mapping as a learning tool for students offers several outcomes. Students develop skills in framing material within temporal and geospatial constructs. The ability to layer data and various media types in creating a map furthers critical thinking and gives students opportunities to understand course content in a complex spatial context. Mapping can be thought of beyond the sense of traditional cartography; we can use images of the universe, floor plans of a building, or molecular structures as the basis for maps on which students can build a story pertaining to their course work and/or research. Fortunately, there are some great tools, freely available, for you and your students to use for mapping projects.

Previously in a post on Resources for Multimedia Creation (October 8, 2014) I mentionedAn 1691 French map of the city of Kamianets-Podilskyi, located in western Ukraine. Google Maps for developers. “With Google Maps Application Programming Interface (API) users can expand, customize, and embed maps and mapping tools into their websites. This includes combining Flickr (the photo sharing website) content with maps. These work well with Google Sites and Google Docs.” Check out the tutorials and articles to get an idea of the types of projects Google Maps will support.

Harvard World Map, developed at Harvard University, is described as “…an online, open source mapping platform developed to lower barriers for scholars who wish to explore, visualize, edit, and publish geospatial information.  The system attempts to address the gap between desktop GIS which is generally light on collaboration, and web-based mapping systems which often don’t support the inclusion of large datasets.” Harvard World Map allows users to import and make visual large GIS data sets. The application facilitates the use of multiple layers to create complex visualizations. Maps can be kept private or shared. There are examples on the homepage as well as a large number of shared maps found under View a Map. This would be a good option for someone wishing to examine correlations among several data sets without having to deal with the steeper learning curve of a program such as ArcView GIS.

For those using Omeka [see Omeka.org, Omeka.net, and a previous Innovative Instructor post, Omeka for Instruction], the Neatline plugin offers a set of tools to allow “…scholars, students, and curators to tell stories with maps and timelines.” Neatline was developed at the Scholars’ Lab at the University of Virginia Library. Omeka and Neatline are designed specifically to support online collections and exhibitions. Take a look at the demos to get a sense of the rich and complex ways in which cultural heritage artifacts, photographs, or other documentation can be layered over maps to provide complex and nuanced interpretive readings of the collected materials.

If you are teaching in the Krieger School of Arts & Sciences or the Whiting School of Engineering at Johns Hopkins, there is another option: Reveal.  Developed here at the Center for Educational Resources, Reveal uses mapping, in the sense of the term that refers to hierarchical image mapping, combined with annotation. “Reveal is a web application for annotating images with rich multimedia content. Using Reveal, you can create a website where image annotations link to image, audio and video resources to illustrate visual relationships.” Watch the video to get a better idea of how Reveal works. Reveal uses JHU authentication and for the present is available only to those teaching on the Homewood Campus.

Macie Hall, Senior Instructional Designer
Center for Educational Resources

Image source: Pixabay.com – An 1691 French map of the city of Kamianets-Podilskyi, located in western Ukraine.

Considerations for Digital Assignments

Image of the handout on considerations for digital assignments

My colleague in the Center for Educational Resources, Reid Sczerba, and I often consult with faculty who are looking for alternative assignments to the traditional research paper. Examples of such assignments include oral presentations, digital and print poster presentations, virtual exhibitions, using timelines and mapping tools to explore temporal and spatial relationships, blogging, creating videos or podcasts, and building web pages or websites.

Reid, who is a graphic designer and multimedia specialist, put together a handy chart to help faculty think about these assignments in advance of a face-to-face consultation with us. A PDF version of this handout is available for your convenience. The text from the chart is reprinted below.

Learning objectives
♦ Have you determined your learning objectives for this assignment? Deciding what you would like your students to learn or be able to do helps to frame the parameters of your assignment. http://www.cer.jhu.edu/ii/InnovInstruct-BP_learning-objectives.pdf

Type of assignment
♦Will there be analysis and interpretation of a topic or topics to produce a text-based and/or visual-based project? Consider alternatives to a traditional research paper.
http://ii.library.jhu.edu/2016/04/08/lunch-and-learn-alternatives-to-the-research-paper/
♦Will there be a need to document objects or materials for a catalog, exhibition, or repository? Defining meaningful metadata and the characteristics of research materials will be important considerations.

Access and visibility
♦Will you want the students’ work to be made open to the public, seen just at JHU, or shared only with the class? Decide up front whether to have students’ work be public or private in order to get their consent and choose the best platform for access.
♦ Will they be working with copyrighted materials? The fair use section of the Copyright Act may provide some latitude, but not all educational uses are fair use. http://www.arl.org/focus-areas/copyright-ip

Collaboration
♦Will you want students to work collaboratively as a class, in small groups, or individually?
Group work has many benefits but there are challenges for assessment and in ensuring that students do their fair share of the work.
http://www.cer.jhu.edu/ii/InnovInstruct-BP_MakingGroupProjectsWork.pdf
♦ Will you want the students’ work to be visible to others in the class or private to themselves or their group?
Consider adding a peer review component to the assignment to help the students think critically about their work.
http://www.cer.jhu.edu/ii/InnovInstruct-Ped_peerinstruction.pdf

Format
♦ Will you want your students to have a choice of media to express their research or will all students use the same solution?
An open-ended choice of format could allow students to play to their strengths, leading to creativity. On the other hand, too many choices can be daunting for some, and it may be challenging to assess different projects equally.
♦ What would be the ideal presentation of the student’s work?

• spatially arranged content (mapping, exhibition)
• temporally arranged content (timeline)
• narrative (website, blog)
• oral presentation
• visual presentation (poster, video)

Formats for digital assignments are not limited to this list. More than one approach can be used if the result fulfills the learning objectives for the assignment.

Some of the solutions that we have recommended to faculty in the past are OmekaOmeka NeatlineTimeline JSPanopto (JHU), Reveal (JHU), Google tools (Google SitesGoogle Maps, Google Docs), Voicethread (JHU), and WordPress.

*************************************************************************************************

Reid Sczerba, Multimedia Development Specialist
Center for Educational Resources

Macie Hall, Senior Instructional Designer
Center for Educational Resources

Image source: Image of the handout created by Reid Sczerba

Time for a Timeline

After the discussion at our April 1st Lunch and Learn: Faculty Conversations on Teaching on the topic Alternatives to the Research Paper, I was asked about applications for creating timelines. Fortunately there are some good options freely available.

Screenshot of TimelineJS timeline created by Time Magazine on the life of Nelson Mandela. Image of the African National Congress.TimelineJS, developed at Northwestern University’s Knight Lab, uses a Google spreadsheet template to create media-rich timelines. Media from Twitter, Flicker, Vimeo, YouTube, Google Maps, Wikipedia, SoundCloud and other sources can be pulled into a TimelineJS. The resulting timeline can be easily embedded into a website. This is a great resource especially if your students are also using other Google applications, such as Google Sites to build a course or project website. There are good directions, a FAQ, and technical documentation offered on the website. Tech support is also offered via email. Here are some examples of timelines created with TimelineJS.

TimeToast may be the easiest to use of the three tools listed here, and the clean and clear interface is visually rich. Media is limited to images, although web links can be included, and a free account may have some advertising. A FAQ page will give you some direction. Examples of publicly posted timelines will give you an idea of the possibilities TimeToast offers. Information on paid plans is available. These allow collaboration with group creation and comment moderation, and are ad free.

Tiki-Toki Timeline is another web-based option with both free and paid versions. Tiki-Toki advertises its software as “…the only online timeline creator that allows you to view timelines in 3d on the web.” The free version is limited to the creation of one timeline with 200 points (called stories), and some of the features are limited. One potential disadvantage of the free version is that you can’t upload media from your computer, you must use images and other media from the web. A work-around would be to upload media to a website you’ve created, and grab the media from that source. You can embed YouTube and Vimeo videos. Examples can be found by scrolling down on the homepage of the website. You can also get information on the paid accounts, including one aimed at teachers. The FAQ page will help you get started.

For more suggestions, see the article Free Educational Technology: Top 10 Free Timeline Creation Tools for Teachers, by Christopher Pappas, November 4, 2014, updated November 2015.

*********************************************************************************************************

Macie Hall, Senior Instructional Designer
Center for Educational Resources

Image source: Screenshot of TimelineJS timeline created by Time Magazine on the life of Nelson Mandela: http://world.time.com/2013/12/05/nelson-mandelas-extraordinary-life-an-interactive-timeline/

Using a Course Blog as a Class Ice-Breaker

In the fall of 2014 I taught a course, Stuff of Dreams: How Advances in Materials Science Shape the World, in the newly created Whiting School of Engineering’s Hopkins Engineering Applications & Research Tutorials (HEART) program. The program introduces undergraduates to engineering research in specific disciplines in a small class taught by advanced graduate students or postdoctoral fellows. The classes meet once a week for two hours for six weeks. The challenge of teaching these one credit, pass/fail courses with no requirement of the students beyond class attendance, is getting the students engaged.

Image showing the word Blogs dropping onto a sheet of cracked ice.The students in my class were freshman, sophomores, and one junior. Not all were engineers, there was one from the School of Public Health. The students had a mix of backgrounds, interests, ambitions. With a two hour class session, I did not want to lecture; I wanted the classes to be discussion based. With no requirements to do assignments, I had to rely on intrinsic motivation to get students to do reading outside of class and participate in discussion.  My first priority was getting them engaged by relating materials science to their interests. I thought I could use a blog to determine what they wanted to learn.

In general, blogging can be an effective way for students to respond to course readings or to work collaboratively in groups. Blogs can also be used to improve students’ writing along with developing their critical and analytical thinking skills. In this case, I used blogs as a way to get to know my students and their interests, specifically as those intersect with materials science.

Materials science is a very broad field. My research uses computational methods based on quantum chemistry not likely to be accessible to beginning students. Before the course started I polled the students using a Google survey to determine which social media platform they would be willing to use. Facebook and Twitter were among the choices that students rejected. I decided to use a blog based on their responses. There are a number of options for blogging platforms, including Blackboard, which offers both course and individual blogs. I used Blackboard for other course materials, but the blog tool didn’t have some features I wanted, including making the blog available to the public, so that it would stand as a record and could be referred to after the course ended. WordPress is a free, easy-to-use option.

I introduced the blog in the first class session, asking the students to spend up to an hour outside of class to pick an area of interest, then research and post two links to resources on their topic on the blog. The students were then asked to do enough background reading on their topic to give a five minute presentation in class at what I called a Wikipedia level. When the students presented in the second class, I used the links they had provided to teach them how to think critically about information on the web. There was a wide range of content collected, everything from Buzzfeed lists to high-level research articles in scholarly journals. I asked the class how they could evaluate the materials. What claims were being made? Were sources cited? Were those sources credible? It was a good way to educate the students on evaluating content for research purposes, something they need to know as they move forward in their education. In this course, I didn’t ask the students to go through the exercise a second time to find better or more appropriate materials, but in a more traditional course, this could be a two-part exercise.

For the second blog assignment, the students were asked to go through the posts made by their peers, read some of the articles, and comment on them. This helped the students get to know each other and to see where their interests in materials science aligned. They engaged by commenting on each other’s posts. Because the students were determining the topics for discussion in these first couple of weeks, it meant that I was teaching on my feet to some extent. If I didn’t know the answer to a question, I would have the students do just-in-time research, using their laptops or other mobile devices right there in class to figure it out.

The blog worked very well as an icebreaker, getting students interested in the course content and engaged in discussions. Student interaction outside of class was another challenge for me, with the course running only six weeks. The blog provided a way for students to continue their work outside of class in a collaborative way. As researchers and instructors our work doesn’t stop at 5:00 PM, neither should class discussion be confined to the time students spend in the classroom. When students are reading they can immediately post what they are thinking, and their peers can respond with comments. This was the case even with the limited use of blogging in my HEART class, but could be even more effective if used throughout a traditional course. I certainly will use a course blog in the future, and have students write more extensively, perhaps in response to assigned readings. I like the idea of having them do peer review of classmates’ posts. Students seem take pride in their writing, especially when it is open to the public and judged by their peers.

Being able to give formative feedback to students for the first assignment was a valuable teaching strategy. I think the students benefited from gaining an understanding of how to evaluate content on the web.

From my perspective there were no disadvantages to using a blog. WordPress was easy to set up and the students found it intuitive to use. That said, there is a need to think about how you set up the WordPress or other blog instance. It is important to organize the pages so that students are clear on where to post each assignment. You will also want to consider what aspects of the blog to make public if that is applicable. As the site administrator you can make these choices. On my blog only the assignments, posts, and my comments are visible to the public; to view and post comments, users have to be registered. This prevents spam comments, which can be a problem. The blog can be seen at https://h2stuffofdreams.wordpress.com/.

*********************************************************************************************************

Anindya Roy,
Postdoctoral Fellow, Department of Materials Science and Engineering, JHU

Anindya Roy received his Ph.D. in 2011 from Rutgers University. As a computational physicist, Roy’s primary research focus is on understanding materials important for energy harvesting, storage and management, using calculations based on quantum chemistry. Besides materials research, he is interested in teaching at the undergraduate level, and understanding the pedagogical aspects of physics and engineering education.

Note: This post has appeared previously in our Innovative Instructor print series: and in interview form in the Center for Educational Resources February 2016 edition of Research & Teaching Tools.

Image source: CC Reid Sczerba, Center for Educational Resources

Teaching with Modeling and Simulations

Logo for Lunch and Learn program showing the words Lunch and Learn in orange with a fork above and a pen below the lettering. Faculty Conversations on Teaching at the bottom.On Friday, March 4, the Center for Educational Resources (CER) hosted the fourth Lunch and Learn—Faculty Conversations on Teaching. For this session, Jeffrey Gray, Professor in Chemical and Biomolecular Engineering, and Rachel Sangree, Lecturer in Civil Engineering, and Program Chair for Engineering for Professionals in Civil Engineering, discussed their experiences using modeling and simulations. Both Gray and Sangree had received Technology Fellowship Grants from the CER that enabled them to develop the models and simulations for courses they teach.

Illustration of beam bending simulation.Sangree [presentation slides] regularly teaches a course, Statics and Mechanics of Materials, with a lab component. The problem has been that “[w]hile they may have been listening, 130 Students from four engineering departments have a lot going on between the time they hear lecture material in class and write their lab reports related to the lecture material.” The labs are staggered in order to keep the number of students in each lab small, with the result being that some students are writing lab reports about content introduced in lecture three weeks earlier. Sangree’s solution was to create simulations of the labs (using Finite Element Models) and a recap of relevant lecture material, and provide these in Blackboard so that students can review the lab and the material needed to write their lab reports. She demonstrated the simulations for three lab exercises: beam bending, torsion, and the tension test, showing us the equipment used in lab and the simulations the students use to review the experiments. These simulations may be viewed if you download the pdf of the presentation slides. In the discussion that followed the presentations, Sangree emphasized that she views these simulations as a resource to improve student learning, and other faculty agreed that this approach and use of simulations had improved learning outcomes in their classes.

Gray [presentation slides] began by giving some background information on PyRosetta  of which he is a founder, and the Rosetta Commons. Rosetta is a community computing project for protein structure prediction. Gray describes PyRosetta as “…an interactive Python-based interface to the powerful Rosetta molecular modeling suite. It enables users to design their own custom molecular modeling algorithms using Rosetta sampling methods and energy functions.”

Illustration of PyRosetta model.Gray teaches Computational Protein Structure Prediction and Design, a course with 15-25 students, with a mix of graduate and upper-level undergraduate students. The course combines lecture sessions and hand-on workshops each week. The course objectives were described as: Students should be able to 1) explain, interpret or modify classic algorithms in structure prediction and design, 2) use standard tools to model biomolecules de novo or by homology, dock biomolecules, and design biomolecules, and 3) create new custom methods and algorithms for specific problems.

Two CER Technology Fellowship Grants have allowed Gray to create a workbook of pedagogical modules that uses PyRosetta to introduce students to structure prediction and design applications. The workbook ensures that the computational tools are available to the students on the first day of class. Gray reported that the workbook and accompanying videos are available and used world-wide, and he has gotten positive feedback from colleagues and the Rosetta community. Gray noted that the PyRosetta platform provides active, hands-on learning, and that engineering students can gain insight and creative advantages by making 3D structural models, exploring hypotheses, and designing improved molecules.

In the discussion following the presentation, Gray mentioned that his biggest challenge has been the varied backgrounds students have in coding skills. Other faculty agreed that core computational requirements are a complicated issue due to differences among the disciplines.

For those looking to integrate modeling and simulations into their classes, it was suggested that there are many resources available online.

Johns Hopkins Krieger School of Arts & Sciences and Whiting School of Engineer faculty will receive email invitations for the upcoming Lunch and Learn presentations. We will be reporting on all of the sessions here at The Innovative Instructor.

*******************************************************************************************

Macie Hall, Senior Instructional Designer
Center for Educational Resources

Image sources: Lunch and Learn logo by Reid Sczerba, Center for Educational Resources. Other images were taken from the presentations by Rachel Sangree and Jeffrey Gray.