Lunch and Learn: From Plato to Pixar – Using Storytelling Frameworks to Drive Learner Engagement and Improved Outcomes

On Tuesday, October 8, 2024, the Center for Teaching Excellence and Innovation (CTEI) hosted the first Lunch and Learn of the Fall 2024 semester. Brian Klaas, Assistant Director for Technology and instructor at the Bloomberg School of Public Health, presented: From Plato to Pixar – Using Storytelling Frameworks to Drive Learner Engagement and Improved Outcomes. Caroline Egan, Teaching Academy Program Manager, moderated the presentation.

Brian Klaas opened the presentation by highlighting the valuable role storytelling plays in the classroom. While sharing facts is essential, building a narrative around those facts provides the context that gives them meaning. When we teach, we enact a narrative; we are telling a story. Stories help students connect abstract or complex ideas to real-world applications, making the content more relatable and engaging. Students are more likely to recall and retain information that resonates with them on some level. Storytelling also encourages students to think critically as they analyze characters, events, and outcomes, which can deepen their understanding of the material.

Klaas went on to describe the four cornerstones of narratives and encouraged audience members to think about how they might apply them to their teaching:

  1. Conflict: What problem are we trying to solve? What are we trying to overcome? What stories as a presenter can I frame through conflict? Conflict gives us drama and tension.
  2. Character: How can you draw people into your lectures or stories? We need facts and data, but we also need to engage with the emotional part of the brain. There are many opportunities to include characters/people into your data – including yourself!
  3. Segmenting: Organizing and chunking information, such as chapters in books, acts in plays, etc., gives our presentation a logical flow. We present one idea at a time, declare why it’s important, before moving on to the next one. Segmenting gives us a sense of moving forward.
  4. Reflection: What does this mean to me? Why is this important? As educators we can incorporate reflection into our teaching in various ways, including think-pair-share, self-assessment, journaling, etc.

Klaas acknowledged that it can be difficult to make the shift from sharing facts to telling stories. He introduced the audience to two storytelling frameworks that can help with this process: the Hero’s Journey and the Pixar Framework.

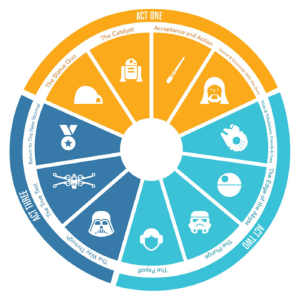
Circular diagram showing the 12 steps of the Hero's Journey.The Hero’s Journey is a popular template that follows the adventures of a hero who faces some sort of conflict, overcomes various obstacles along the way, and eventually emerges victorious. In the process, the hero is transformed in some way, embracing newfound knowledge and lessons learned. Examples of stories that follow this template include: The Lord of the Rings, Harry Potter, and Star Wars. Originally 12 steps, The Hero’s Journey template can be divided into 3 main acts:

  1. Departure/Separation: Where do things stand? This act presents the background, the current cultural context, followed by an event that pushes the hero to begin the journey.
  2. Initiation: What went wrong? What is the issue? Why can’t we move forward? This act explores the series of challenges faced by the hero that help to create tension and conflict.
  3. Return: What lessons did we learn? Why does this matter? This act shows what was learned and how the world is changed, why it is meaningful.

Klaas gave an example of a Hero’s Journey story:
He told the audience about one of his former students who traveled to Nigeria to study that country’s waste disposal and sewage system. While there, she noticed a woman repeatedly leaving her hut to go out into the grass. When the student asked why, she was told that the woman recently had a baby, was having some problems, and wasn’t able to engage with the community. The student learned that the woman experienced an obstetric fistula, a serious complication of childbirth that causes women to suffer incontinence, shame, and social segregation. The student went to community leaders and tried to explain to them that this is common, that the woman just needed proper care. The leaders rejected her plea. For the student, this was a lesson in cultural humility. She learned that local hospitals are not equipped to deal with this issue. This encounter led to her to shift her studies to help women deal with this problem. She ended up working on a project to help women in this region.

Klaas noted that the hero does not have to be a person – it could be a cell, for example – and that this framework could be a powerful way to present research to the world.

The Pixar framework, which forms the foundation of animated Pixar films, such as Finding Nemo and Toy Story, uses the following format:

  • Once upon a time… (context of the world)
  • And every day… (everyday life in that world)
  • Until one day… (incident that launches the story)
  • And because of this… (the character’s journey)
  • And because of that… (new journey the character takes)
  • Until finally… (resolution of the story)

This framework can be applied to a number of different areas, such as literature, health sciences, and history. It can be used to tell a story about why things fail or why things change – it doesn’t always have to be a success.  Klaas gave the example of how this format could be applied to narrate a problem such as antibiotic resistance:

  • Once upon a time… You get an antibiotic every time you go to the
    doctor
  • And every day… Antibiotic-resistant bacteria are on the rise,
    and here’s the data to prove it!
  • Until one day… Strategy for reducing antibiotic
    overprescription and sparking new research
  • And because of this…Reduction in antibiotic-resistant microbes;
    increase in funding for new antibiotic research
  • And because of that… Better health outcomes for people; better
    incentives for private research
  • Until finally… Generations of new antibiotics without living
    in fear of paper cuts killing us

Audience members were asked toOrange clownfish from Finding Nemo movie. share their ideas of how they might use this framework in their courses: One guest suggested using the framework to share research findings about high cholesterol with students in a concise manner. Another guest suggested using it to describe the history of drunk driving and the evolution of the breathalyzer test, leading to the development of a handheld alcohol detection device. And another guest suggested using it to talk about climate change in order to facilitate discussion.

The presentation wrapped up with a brief Q and A session:

Q: How vital is it to center our teaching around one protagonist as opposed to many? BK: Use storytelling where you can. It’s hard to use all the time, but having context makes it relevant. Always look for meaning, something that will be remembered down the line.
Guest: It helps when trying to make data meaningful. Seeing the story of one person works well. Sometimes too many people [as protagonists] is overwhelming, it becomes abstract. But sometimes showing the numbers affected [in terms of data] can be very powerful.

Q: Students have to write personal narratives for their medical school applications; they try to present themselves as the perfect candidate. Do you recommend using storytelling here?
BK: Yes, you can use storytelling in an application. Storytelling comes from written form, so yes, it will work in writing. My son is in the process of writing his college essays – he’s using the Pixar model right now. It made it easier on him to tell the story once he had a backbone.

Q: Could storytelling be used to help students solve math-based problems? Do you see this?
BK: I haven’t used it this way, but a colleague used it to share complicated math and statistics results from his research. I can see it working, through logical proofs. You don’t have to use the whole Pixar framework – you can use 4 of the 6 steps, for example, to make it work for you.

Amy Brusini, Senior Instructional Designer
Center for Teaching Excellence and Innovation
 

Image source: Lunch and Learn logo, Writer’s Digest, Disney/Pixar

Lunch and Learn: Active Learning Techniques

On Tuesday, March 12th, the Center for Teaching Excellence and Innovation (CTEI) hosted a Lunch and Learn on Active Learning Techniques: Advice and Guidance from Experienced Faculty. Faculty panelists included Nate Brown, Senior Lecturer, University Writing Program (KSAS); Robert Leheny, Professor and Department Chair, Department of Physics and Astronomy (KSAS); and Michael Falk, Vice Dean of Undergraduate Education and Professor, Department of Materials Science and Engineering (WSE). Caroline Egan, Teaching Academy Program  Manager, moderated the discussion.

Caroline began the session by asking panelists how they got started with active learning and what they would recommend to those who were thinking about implementing it.

Nate Brown described how he heavily relied on his lecture notes to deliver content to students when he first started teaching. As he’s gained more experience, he’s moved away from using lecture notes and actively involves students in their learning.  Brown structures his classes now in such a way that the students drive the conversation and solve problems collectively, leading to greater retention of information and increased engagement. He makes a point of having students think about “why they are doing what they are doing.”

Robert Leheny recalled how the Provost’s Gateway Sciences Initiative from several years ago provided funding to support the redesign of gateway science courses, such as the Introduction to Physics course, which he teaches. The goal of the Gateway Sciences Initiative was to evolve the pedagogy in large introductory science courses to produce better student outcomes.

The Intro to Physics redesign, which was modeled after similar large lecture style courses at NC State and MIT, moved away from a traditional lecture style to a much more interactive experience. Students are divided into groups and sit at round tables instead of in rows, and they solve problem sets together during class rather than at home. This in-class work is partly enabled by a flipped classroom approach which enables students to review the content before coming to class. Leheny said the department now offers two versions of Introduction to Physics that students can select from: an active learning style and a more traditional auditorium/lecture style.

Michael Falk first started implementing  active learning by using  clickers in a 200-student Introduction to Computer Programming course at the University of Michigan several years ago. Since he’s been at Hopkins, his classes have been smaller, allowing him to approach active learning in different ways. Falk gave an example of how he flipped an upper-level materials science course (which is now also part of the Gateway Computing program) so that students work in an online textbook outside of class and do more collaborative work during class. Another example is a First-Year Seminar class taught by Falk, Turing’s Shadow: Uncovering What’s Hidden in STEM. This discussion-based course covers a range of topics, some of which are sensitive, and students are often afraid to speak up. To address this, Falk created a series of discussion cards to help ease students’ discomfort. The cards provide discussion prompts for students, such as “Clarification: Ask for further explanation about something,” and they also inject some fun elements into the conversation by asking respondents to present their response “in the form of a song,” or “while walking around the room very quickly,” for example. It turns the exercise into a game and helps students to feel more comfortable participating in class.

Caroline continued by asking the panelists what their definition of active learning is and to provide a counter-example of it, which would bring its definition into better relief.

NB:   I think it involves giving students a stake in what we’re doing. For example, helping to define the parameters of a paper we’re going to write. I see the professorial role as one of support, like “air traffic control.” With active learning, students are involved in the creation of their own learning.

RL: The primary component of active learning in physics is peer instruction. Students need to be able to solve problems. We don’t use class time to introduce students to concepts, but instead give students an opportunity to practice solving problems where there are resources to help facilitate these skills. For example, students are divided into groups of three and explain to each other how they would go about solving a problem. The act of explaining the problem to someone else helps to solidify their own understanding. A counter example would be the old way of the instructor speaking from the blackboard, talking uninterrupted for most of the class period.

MF: Active learning is learning by doing. Students are engaging with content in a supportive environment. We are teaching a different group of students at Hopkins now – there are many more first- generation, limited-income, and/or underrepresented students with very different backgrounds. We need to think proactively about leveling the playing field for students. This is evident in the data around class outcomes: classes taught using active learning techniques have lower levels of students failing or dropping out. This is even more true for students in underrepresented groups.

RL: We also see this in Intro to Physics. We have the two versions of the course: one in the auditorium (which may have some active learning elements in it), and one designed specifically as an active learning course. The homework and exams are the same in both courses. The outcomes show that failing grades are much less likely to occur in the active learning course.

MF: I used to think my job as an instructor was to deliver content and material. Now, with active learning, I think my job is to deliver an experience.

Caroline continued by asking panelists for a simple active learning technique that instructors can implement right away.

NB: This may sound crazy – it comes from a writer colleague of mine. I was having students read out loud in class and noticed they were struggling: they didn’t feel comfortable, they were shy, or were experiencing language barriers, etc. I then asked them all to read in chorus (at the same time). No one understood what they were hearing, but it shocked them into it being ok to share. It really helped them get over their nerves.

RL: Think-Pair-Share. This technique works very well in a large lecture environment. We give students a multiple choice question and have everyone vote on the answer. Next, they have to find someone who voted differently and try to convince them to change their answer. We then ask students to vote again. The results are that there are usually more correct answers the second time. You do need good questions for this to be effective.

MF: An idea for STEM classes, figure out a way to shorten your lecture and hand out the problem set at the end of class. Allow students to work on them with each other. Ask students to write down the steps on how they would solve the problem, but not actually solve it. Allow time for a report out at the end. This gives them a chance to support each other while organizing information.

CE: A complimentary Humanities example: In my first-year writing class, I hand out labeled strips of paper to students with our class readings on them and ask them to organize the strips in a way that would help the students use the readings in their papers. Also, I give students writing prompts, break them into groups, and ask them to find out where they would find the answers to the prompts. This helps to get them in the right mindset of locating good sources.

Two other examples of active learning were mentioned by faculty guests. One instructor explained how she has students use Legos to construct the analysis of an argument. They connect more and more Legos to build supportive elements of their argument and take away those that they disagree with. Another instructor mentioned that she has students act out responses in class.

The session continued with questions from the audience for the panelists:

Q: In reference to Think-Pair-Share, have you observed any competitiveness among students or reluctance to participate in these activities?
MF: We tell students it has nothing to do with their grade.
RL: We do the same. We also tell them there is no curve and it is possible for everyone to get an A, which reduces overall competitiveness.
NB: One of the great things about this exercise, where students are engaging with each other, is that they get to hear from peers that are from all over the world. We turn it into a social space where they can feel comfortable sharing.

Q: (From a librarian) I recently had about 30 minutes to work with students in a research class. I received feedback from a student that I didn’t do enough active learning in the class, despite doing a brainstorming exercise with them. What do you do when you need more active learning in such a short amount of time?
RL: Explain to students why you structured the class like you did. It will help if you get their buy-in. Maybe the answer is to announce at the beginning that what you’re doing is in fact active leaning.
MF: Students like playing – it makes for a positive learning experience. Perhaps turn part of it into a game/play. And then explain what and why you’re doing it this way.

Q: Are there any active learning experiences to share when you’re guest lecturing? Do you use the same or different strategies?
MF: It needs to be a different strategy. As a guest, you don’t have the advantage of repetition or control of the environment. Explain to students what you’re doing and do the best you can with the constraints that you’re under.
CE: Be very intentional about your choices. At the end, ask them one thing they will remember from the class. This is a good recall exercise.
NB: As a guest speaker, you already are a bit novel since your presence is different than their regular day. Maybe use a novel activity that they will remember.

Q: Could you each share how you put groups together intentionally instead of having students self-form?
RL: Students are put into groups of three. Groups are engineered this way – we switch a few times during the semester. The students don’t know it, but we add them to groups according to their performance on the midterm. In each group, there is one person that scored at the top, one from the middle, and one from a low level. The top level person gets more practice articulating ideas. The lower level person gets the benefit of working with someone who has command of the material. We also group according to gender: we avoid placing two men and one woman in a group to avoid women being excluded. There is research that supports this.
NB: We also do a lot of group work. Halfway through the semester, I ask students to work with someone they haven’t worked with before. I also ask them to sit next to someone different. It results in a richer peer review experience.
MF: I have students do a self-assessment at the very beginning of the course and use the results of the assessment to group students.

For more information about the active learning topics discussed at the event, please see this  Active Learning For Distribution folder of materials developed by Caroline Egan.

Amy Brusini, Senior Instructional Designer
Center for Teaching Excellence and Innovation
 

Image source: Lunch and Learn logo, Unsplash, Pixabay

Lunch and Learn: Canvas Show and Tell

 On Wednesday, November 1st, the Center for Teaching Excellence and Innovation (CTEI) hosted a Canvas Show and Tell: Share and Learn about Engaging and Effective Uses of Canvas. Alison Papadakis, Teaching Professor and Director of Clinical Psychological Studies in the Department of Psychological & Brain Sciences, hosted the discussion. She was joined by Emily Braley, Assistant Dean for Undergraduate Academic Affairs and Associate Teaching Professor in the Department of Mathematics, and Jamie Young, Lecturer in the Department of Chemistry. Beth Hals, Brian Cole, and Caroline Egan from the CTEI helped facilitate the event.

Alison Papadakis opened the discussion describing how her interest in Canvas began with her kids, who were using it during COVID. (JHU was still using Blackboard at that time.) Watching her kids struggle with poorly designed Canvas classroom interfaces influenced the way she organized her own Canvas classroom once JHU adopted it as our new learning management system (LMS).  One big decision she made was to stay away from using the Module function, which is often the most common  way to organize content in Canvas. Instead, Papadakis explained how she used the Canvas Page function to create a page with a table outlining her course schedule with hyperlinks to the rest of her content. The homepage of her Canvas site looks like a calendar with hyperlinks for each class day. She regularly checks in with her students, asking if they have trouble finding anything in the course and they always assure her that they do not. Papadakis also makes the Files area in Canvas available to her students, as an additional way for them to access course content, but they tell her they don’t use it. She says the course schedule page is not the “prettiest” display of content, but the functionality works very well for her course and students can easily find what they need for each class period.

Papadakis also does a lot of student advising and needed a place to post links and share information with students. She decided to use a community site, which is similar to a website, but built inside of Canvas. All majors and minors have access to the site as well as other faculty; it is also possible to add other users to the site if necessary. Brian Cole clarified that the key difference between a standard Canvas course and community site is that a standard site is for credited courses and is automatically generated by  JHU’s Student Information System (SIS). Community sites, which all faculty have the ability to request, are for non-credit activities and are intended to share information and resources across multiple populations.

Emily Braley described how the mathematics department is using a community site to host their math placement exam. The university’s switch to Canvas provided an opportunity to revise the exam, which was previously hosted in Blackboard. In Canvas, students are provided with more information about why they are taking the exam as they are guided through a series of steps to help them decide which exam to take. With the help of CTEI staff, Braley described how they embedded a Microsoft form inside of Canvas that asks students what math courses they took in high school, including AP courses. The branching feature of the form then directs students to the appropriate placement exam based on their answers. There are also practice tests that students can take before the actual exam.

The exam itself is set up using a Canvas feature called Mastery Paths. This feature allows an instructor to set up to three ranges of scores for the exam; once they take the exam, student scores are translated into a recommendation for enrollment. Braley also created a customized grading scheme for the exam, which contains information about interpreting the results as well as the actual score for the students.

Braley is very excited about the potential for data analytics with the revised exam process. Using the form provides the department with data which can help identify trends and determine if students are being placed correctly.  All incoming math students are encouraged to take a math placement exam; so far this fall, close to 1100 students have taken the placement exam.

Jamie Young was looking for a way to avoid having to answer the same questions repeatedly from the 640 students in his Introduction to Chemistry lab course. Using HTML code, he was able to create a dropdown FAQ page in Canvas containing embedded links. He estimates he has received 50-60% less questions this semester so far since posting the FAQ page.  He also used HTML to add buttons and links to his syllabus that link out to everything in the course, similar to Alison Papadakis’s course schedule. He believes this saves time for students as they are able to find many things very quickly. Additionally, Young embedded a live Google Document into the course that contains his course schedule. This makes it really easy to update the schedule when necessary as any changes made will immediately be pushed to Canvas – no need to upload an edited document each time a change is made.

In another course, with a combined lecture and lab, Young struggled with displaying a large amount of content. He initially put everything into modules but wasn’t happy with how disorganized they became after adding so much material. He has since turned each module into its own page and links everything from the page. This has been working out much better – again, students are able to find things quickly and easily. Young insists you don’t need much coding knowledge to take advantage of these features in Canvas; you do need to know – or have access to – a  few HTML commands.

The discussion included the following questions from the audience:

Q (for Alison Papadakis): Do you need coding experience to create this [the course schedule]?
AP: I just created it in Word and cut and pasted it in – no coding necessary.

Q (for Alison Papadakis): How do you link the “tone” of your course to the course schedule?
AP: This is an in-person course, so there is a lot of in-class discussion around the course and how it works at the beginning. The course schedule is just the pragmatic piece so we can keep things organized.

Q (for Alison Papadakis): It looks like you assign readings before the semester begins – do you plan everything ahead of the semester, before it starts?
AP: I have taught this course over ten times, so I know basically what’s coming. I put placeholders in for things I don’t know yet. You’ll notice it says ‘Tentative Schedule’ so I can allow for shifting things around if needed. I do need to remember to update the Canvas calendar when making changes to my course schedule.

Q (for Alison Papadakis): Can anyone access the community site?
AP: No, they have to be added to the roster.

Q: (For Beth Hals, CTEI’s Sr. Instructional Technologist) Can you explain Mastery Paths? Is it the same as locking/unlocking a Module?
BH: Mastery Paths are affiliated with some sort of assessment in Canvas. As the instructor, you can set three different sets of score ranges that you use to then send students on their next ‘path’ based on their results. Unlocking modules is a little different – you first set prerequisites on a module that must be completed before the module will unlock.

Q (for Jamie Young): To a neophyte, it’s a little overwhelming to see what you’ve done – there seem to be many ways of doing the same thing. Could you compare and contrast the ways of organizing your syllabus?
JY: You can use the Rich Content Editor (RCE) in Canvas to build your syllabus. If you want to add something like buttons, you would then toggle the RCE to view the HTML editor. Using HTML  is more complicated for sure, but with some basic knowledge you can do it. I would be happy to share what I’ve done and then you can just fill in your information and cut and paste it into your course. To embed the Google Form, I followed online directions that I googled.

Brian Cole, CTEI’s Associate Director for Instructional Technology: You don’t need any HTML  knowledge to embed anything into Canvas. You can use the Rich Content Editor (RCE) to do this. There is an “embed” option in the menu of the editor. You also don’t have to do every page. You can pick and choose what parts of your course to make pretty.

Q: Did Jamie build his syllabus in AEFIS?
BC: No, Jamie built his syllabus using the Canvas Syllabus page. You can still use your own syllabus in conjunction with the AEFIS syllabus – they can coexist. (Note: New name for AEFIS is Heliocampus.)

Q (for Jamie Young): Could you provide a little more information on creating tabs?
JY: They are just HTML code. I used HTML 5. You have to go into the HTML editor in Canvas and use “div” tags to build tabs. Start with the blank tabs in html, then go back to the RCE and fill in the text as needed. You can use copy and paste to make it easier.

Q: Can I move JavaScript headers into Canvas?
BC: No, Canvas will strip them out. An alternative is to embed the page into the Canvas page.
BH: There is something called the Redirect tool that may help. This tool adds an item to your navigational menu. You pick the text for what will display in your menu and it will link to a particular page.

Q: Any ideas about making grading easier?
EB: We use auto grading on all quizzes. We also use banks of questions, so that each quiz pulls from different banks. New Quizzes has matching question types that are more work for students, more robust, but still auto graded. Another thing about New Quizzes is the ability to render Latex [a typesetting software for math symbols]. This has been very useful for us – it’s so much cleaner for students. It renders as accessible MathML, which can be read by a screen reader. This is much better than posting a PDF that is read as an image.
We also use Gradescope, which is an external tool that helps us streamline grading. Students upload their work to Gradescope (inside of Canvas) and you can set it up to help auto grade problems.
JY: We also use Gradescope extensively in Chemistry. We scan written work into Gradescope and it is automatically graded. The system has gotten better at reading handwriting. It has made handwritten assignments so much easier to grade. One caveat about Canvas quizzes: they don’t allow for numbers past 4 decimal places, which we need.

A word about accessibility in Canvas:
EB: You can have Canvas tell you if your material is accessible or not. Use the accessibility checker in the RCE to help you with this.
BH: I also wanted to mention that it’s very easy to duplicate pages in Canvas – build it once, duplicate the page, then fill in what you need to change. It’s like building a template for yourself and reusing it.

For more information about topics discussed at the event, please see this Canvas resource developed by Beth Hals.

Amy Brusini, Senior Instructional Designer
Center for Teaching Excellence and Innovation
 

Image source: Canvas logo

Lunch and Learn: Inclusive Pedagogy

On Tuesday, October 19, 2021, the Center for Educational Resources (CER) hosted a virtual Lunch and Learn: Inclusive Pedagogy. Karen Fleming, Professor in Biophysics, and Mike Reese, Associate Teaching Professor in Sociology and CER director, each presented strategies that are important to them in helping to make their classes more inclusive:

  • Recognize that everyone comes from a different place with different experiences. Fleming mentioned The Privileged Poor, a book by Anthony Jack, that addresses the struggles faced by less privileged students after being admitted to elite universities. She explained that taking students’ backgrounds into consideration and embracing differences is vital to their success.
  • Try to instill a growth mindset. In her teaching, Fleming acknowledges to her students that the work is difficult, it can be a struggle at times, and it’s ok if you don’t get it right the first time – this is all part of learning. She tells her students that everyone has unlimited potential and encourages them to keep practicing and they will come away with new skills. Fleming stressed the importance of trying to get students to internalize this way of thinking and offers her students a great deal of positive reinforcement throughout the semester.
  • Show the humanity of science and diversify materials. Fleming described how she makes an effort to showcase diverse scientists who are working in the field – people of color, women, etc. Students need to see role models and images of people that look like them. Like Fleming, Reese explained how he also makes an effort to display photos of diverse experts in the fields as he discusses key findings or theories in sociology..
  • Learn students’ names. Reese acknowledged this can be a challenge if the class is large. He suggested instructors print out the student photo roster from SIS and/or bring tented name cards to the first class for students to display on their desks (if teaching in person) to help learn names. Reese stated that students are more engaged and come to office hours more often when he makes an effort to learn their names.
  • Use non-competitive grading strategies. Reese noted that this was one of the recommendations in JHU’s Second Commission on Undergraduate Education (CUE2) report. Using straight grading, rather than curved, is one example. Another example is to add a standard number of points to every students final score if they overall average is lower than expected, which might suggest the test was more challenging than intended.
  • Conduct a mid-semester survey. Reese described how he administers a brief mid-semester survey that is anonymous. He tells students ahead of time that he may not be able to address every concern, but will do his best to support them. Once submitted, he summarizes the results for students and outlines any changes he plans to make.
  • Explain the purpose of different components in your class. Reese gave the example of something basic like office hours. First generation students may not understand the purpose or value of office hours – it is a chance to ask for help but also discuss career goals with instructors. Taking the time to explain resources that are available to students has proven very useful.
  • Follow the principles of Universal Design for Learning (UDL). UDL is an approach to designing instruction in flexible ways in order to reduce barriers to learning. For example, instructors can provide alternatives when giving an assessment – some students may take an exam, others may submit a paper, etc. Reese acknowledged that this often means more work on his end, as he will be grading different types of assignments. He noted that although the format may be different, he is assessing students according to the same learning objectives.

The presentation continued with faculty attendees offering comments and suggestions of their own:

  • One faculty member explained how she thinks very carefully about what language she uses with students to mitigate her own implicit biases. She thinks about how certain words (i.e. binary language) may unintentionally signal something to students and is careful to avoid this whenever possible. Fleming agreed and stated how important it is that we all regularly examine our own biases; we should be open with students and let them know we are making an effort to communicate without bias. Reese mentioned the Harvard implicit bias test which is a tool that can help all of us discover our own hidden biases.
  • Another faculty member shared how she has found success with specifications grading to help instill a growth mindset. With specifications grading, students have multiple chances to succeed and are given lots of feedback to help them reach their goals. The faculty member also pointed out that using specifications grading is another example of a non-competitive grading strategy as students are only graded on the work they choose to complete.
  • An engineering faculty member has made an effort to proactively host events that feature speakers of varied races, cultures, and identities in order to show students who make up this particular field of study.
  • Another faculty member stressed the importance of using live captions and how beneficial they are to students and how much students appreciate them.

Towards the end, there were a few questions from the audience:

Q:  Regarding growth mindset, what exactly do you say to students?

A: Fleming responded that she tells her students everyone can be successful with whatever task they are working on, that practice is important, and failure is ok. Some students feel that if they don’t succeed quickly, they are a failure and may lose motivation to persist on difficult topics. She described how she explains the process to students like a journey – you will get to a better place than you are now and you will become more confident with time and practice. Fleming gives her students lots of encouragement throughout the semester.

Reese added that he consistently provides feedback to students throughout the semester and continually shows them examples of their success.

Q: What about students’ own biases? This comes up in teaching evaluations.

A: Fleming explained how she includes a discussion about implicit bias with her students at the beginning of the semester. She tries to make her class a positive, inclusive environment and asks that students do the same by honoring and respecting others’ opinions. She also discusses stereotypes of scientists and asks students not to evaluate her in that way.

Q: I find that most of the time, female students do not speak up. What can we do about this?

A: Reese responded that if working in groups,  a best practice is to ensure no group contains a minority of underrepresented minorities. For example, with groups of 3 there should be 0,2, or 3 woman in each group. He also suggested giving students multiple ways to participate, such as sharing questions through different modalities (email, chat, raising their hand to comment).

Q: Can we expand the time on assessments to accommodate everyone?

A: Reese replied yes, giving everyone more time will lower the pressure for everyone on that assessment. However, there are rules that still need to be followed. Reese suggested working with Student Disability Services if there are specific questions about accommodating students. Another option would be to allow students an alternative to a timed assessment.

Amy Brusini, Senior Instructional Designer
Center for Educational Resources

Image Source: Lunch and Learn Logo, Pixabay


Strategies for an Inclusive Classroom

This summer, the Center for Educational Resources offered a multi-day Best Practices in University Teaching workshop for JHU faculty to learn about evidence-based teaching practices. Participants explored topics such as best practices in course design, active learning strategies, and various assessment techniques. One of the many sessions that generated a great deal of discussion was the Inclusive Pedagogy session, which addressed the importance of accommodating the needs of diverse learners in a supportive environment.  The session was led by Dr. Karen Fleming, a professor in the Biophysics department who is also nationally recognized for her efforts in raising awareness on overcoming biases and barriers to women in STEM.  I played a small role in the presentation by providing a brief introduction and overview of Universal Design for Learning (UDL), a research-based educational framework that helps remove unnecessary barriers from the learning process.

During the session, participants were encouraged to examine their own biases by reflecting on an unconscious bias test they took just before the session. Many were clearly dismayed by their own results; Fleming reassured them that we all have biases and that accepting this fact is the first step in addressing them.  She then shared a real-world example of unconscious bias toward women in STEM that is published in the Proceedings of the National Academy of Sciences. The shocking results of this study, which show that even women faculty in STEM display a preferential bias toward males over females, resulted in an engaging discussion. The dialogue continued as participants then debriefed about a video they watched, also before the session, which featured a teaching assistant (TA) stereotyping various students as he welcomed them to class.  The video was intentionally exaggerated at times, and participants were eager to point out the “over the top” behavior exhibited by the TA. Participants were inspired to share personal experiences of bias, prejudice, and stereotyping that they’ve encountered in the classroom either as students or instructors.

Toward the end of the session, the focus shifted to thinking about strategies that would mitigate instances of biased behavior and instead encourage a more inclusive classroom environment. hands reaching toward each otherAs a culminating exercise, we asked participants to consider the principles of UDL as well as ideas and discussions from earlier in the session to complete an “Inclusive Strategies Worksheet;” the worksheet would contain concrete strategies that would make a measurable difference in terms of inclusivity in their classrooms. The participants were very thoughtful in their responses and several of their ideas are worth sharing:

  • Administer a pre- or early-semester survey to get to know the students and build community.
  • Include a “campus climate” section in the syllabus with language expressing a commitment to respecting diverse opinions and being inclusive.
  • On the first day of class, have students create a “Community Agreement” to establish ground rules for class discussions, online discussions, and group activities. This can be revisited throughout the semester to adjust what is working/not working.
  • Acknowledge that there may be uncomfortable moments as we face mistakes and hold each other and ourselves accountable. Encourage students to “call in” when mistakes (intentional or not) occur, rather than “call out” or “cancel” so that we may learn from each other.
  • Work collaboratively with students to develop rubrics for assignments.
  • Include authors and guest speakers with varied cultures, backgrounds, and identities. Include images, readings, examples, and other course materials that are diversified. If opportunities are limited, have students do a reflective exercise on who/what is missing from the research.
  • Share content with students in multiple ways: research papers, videos, images, graphs, blog entries, etc.
  • Increase the number of active learning activities to enrich the learning experience.
  • Offer options to students: vary the types of assignments given and allow for a choice of ways to demonstrate knowledge among students when possible.
  • Follow accessibility guidelines: ensure video/audio recordings have closed captioning and/or a transcript, for example.
  • Create opportunities for students to discuss their lived experiences in the classroom and/or on assignments.
  • Provide opportunities for students to participate anonymously without fear of judgement (i.e. using iClickers or Jamboard).
  • Conduct activities that engage students in small groups so they get to know one another. Encourage students to use these connections to identify study partners. Consider switching groups throughout the semester so students meet additional partners.

Do you have additional strategies to share? Please feel free to add them in the comments.

Amy Brusini, Senior Instructional Designer
Center for Educational Resources

Image Source: Best Practices in University Teaching Logo, Pixabay

Expanding Students’ Research Skills with a Virtual Museum Exhibit

Morgan Shahan received her PhD in History from Johns Hopkins University in 2020. While at Hopkins, she received Dean’s Teaching and Prize Fellowships. In 2019, her department recognized her work with the inaugural Toby Ditz Prize for Excellence in Graduate Student Teaching. Allon Brann from the Center for Educational Resources spoke to Morgan about an interesting project she designed for her fall 2019 course,“Caged America: Policing, Confinement, and Criminality in the ‘Land of the Free.’”

I’d like to start by asking you to give us a brief description of the final project.  What did your students do?

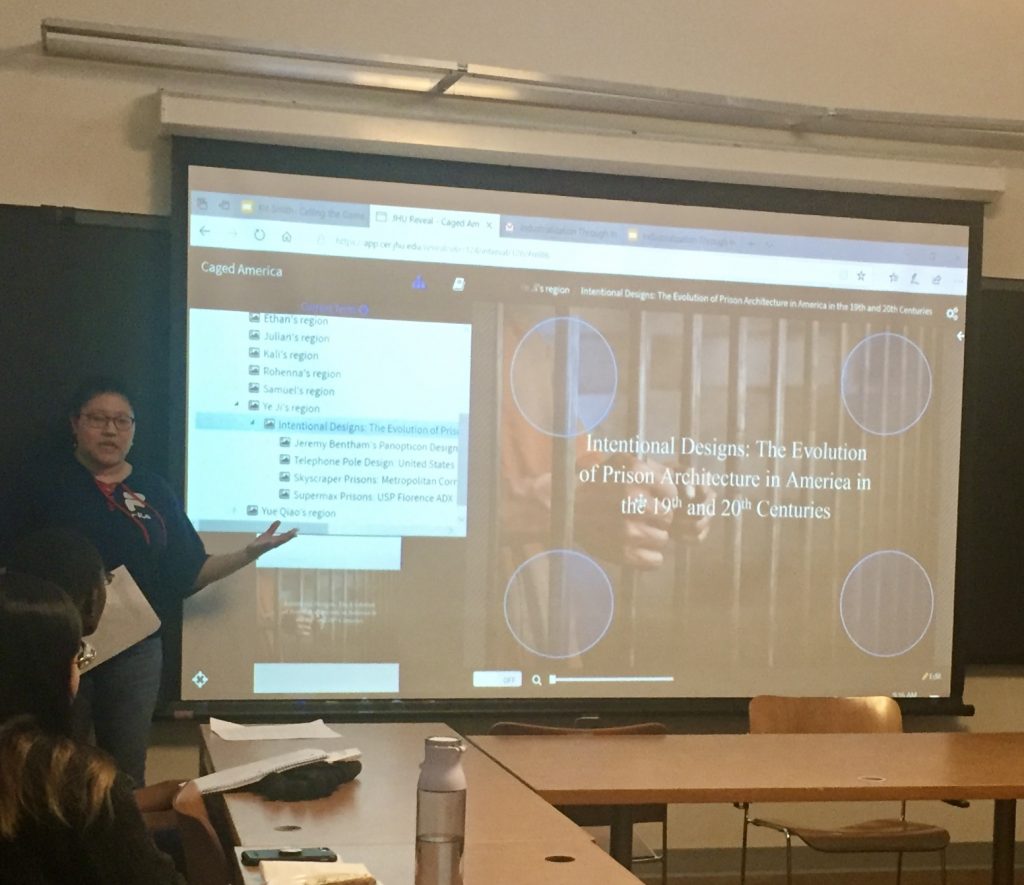
Students created virtual museum exhibits on topics of their choice related to the themes of our course, including the rise of mass incarceration, the repeated failure of corrections reform, changing conceptions of criminality, and the militarization of policing. Each exhibit included a written introduction and interpretive labels for 7-10 artifacts, which students assembled using the image annotation program Reveal.  On the last day of class, students presented these projects to their classmates. Examples of projects included: “Birthed Behind Bars: Policing Pregnancy and Motherhood in the 19th and 20th Centuries,” “Baseball in American Prisons,” and “Intentional Designs: The Evolution of Prison Architecture in America in the 19th and 20th Centuries.”

Can you describe how you used scaffolding to help students prepare for the final project?

I think you need to scaffold any semester-long project. My students completed several component tasks before turning in their final digital exhibits. Several weeks into the semester, they submitted a short statement outlining the “big idea” behind their exhibitions. The “big idea statement,” a concept I borrowed from museum consultant Beverly Serrell, explained the theme, story, or argument that defined the exhibition’s tone and dictated its content. I asked students to think of the “big idea statement” as the thesis for their exhibition.

Students then used the big idea to guide them as they chose one artifact and drafted a 200-word label for it. I looked for artifact labels that were clearly connected to the student’s big idea statement, included the context visitors would need to know to understand the artifact, and presented the student’s original interpretation of the artifact. The brevity of the assignment gave me time to provide each student with extensive written comments. In these comments and in conversations during office hours, I helped students narrow their topics, posed questions to help guide analysis and interpretation of artifacts, and suggested additional revisions focused on writing mechanics and tone.

Later in the semester, students expanded their big idea statements into rough drafts of the introductions for their digital exhibit. I asked that each introduction orient viewers to the exhibition, outline necessary historical context, and set the tone for the online visit. I also set aside part of a class period for a peer review exercise involving these drafts. I hoped that their classmates’ comments, along with my own, would help students revise their introductions before they submitted their final exhibit.

If I assigned this project again, I would probably ask students to turn in another label for a second artifact. This additional assignment would allow me to give each student more individualized feedback and would help to further clarify my grading criteria before the final project due date.

When you first taught this course a few years ago, you assigned students a more traditional task—a research paper. Can you explain why you decided to change the final assignment this time around?

I wanted to try a more flexible and creative assignment that would push students to develop research and analytical skills in a different format. The exhibit project allows students to showcase their own interpretation of a theme, put together a compelling historical narrative, and advance an argument. The project remains analytically rigorous, pushing students to think about how history is constructed. Each exhibit makes a claim—there is reasoning behind each choice the student makes when building the exhibit and each question he or she asks of the artifacts included. The format encourages students to focus on their visual analysis skills, which tend to get sidelined in favor of textual interpretation in most of the student research papers I have read. Additionally, the exhibit assignment asks students to write for a broader audience, emphasizing clarity and brevity in their written work.

What challenges did you encounter while designing this assignment from scratch?  

In the past I have faced certain risks whenever I have designed a new assignment. First, I have found it difficult to strike a balance between clearly stating expectations for student work while also leaving room for students to be creative. Finding that balance was even harder with a non-traditional assignment. I knew that many of my students would not have encountered an exhibit project before my course, so I needed to clarify the utility of the project and my expectations for their submissions.

Second, I never expected to go down such a long research rabbit hole when creating the assignment directions. I naively assumed that it would be fairly simple to put together an assignment sheet outlining the requirements for the virtual museum project.  I quickly learned, however, that it was difficult to describe exactly what I expected from students without diving into museum studies literature and scholarship on teaching and learning.

I also needed to find a digital platform for student projects. Did I want student projects to be accessible to the public? How much time was I willing to invest in teaching students how to navigate a program or platform? After discussing my options with Reid Sczerba in the Center for Educational Resources (CER), I eventually settled on Reveal, a Hopkins-exclusive image-annotation program. The program would keep student projects private, foreground written work, and allow for creative organization of artifacts within the digital exhibits. Additionally, I needed to determine the criteria for the written component of the assignment. I gave myself a crash course in museum writing, scouring teaching blogs, museum websites, journals on exhibition theory and practice, and books on curation for the right language for the assignment sheet. I spoke with Chesney Medical Archives Curator Natalie Elder about exhibit design and conceptualization. My research helped me understand the kind of writing I was looking for, identify models for students, and ultimately create my own exhibit to share with them.

Given all the work that this design process entailed, do you have any advice for other teachers who are thinking about trying something similar?

This experience pushed me to think about structuring assignments beyond the research paper for future courses. Instructors need to make sure that students understand the requirements for the project, develop clear standards for grading, and prepare themselves mentally for the possibility that the assignment could crash and burn. Personally, I like taking risks when I teach—coming up with new activities for each class session and adjusting in the moment should these activities fall flat—but developing a semester-long project from scratch was a big gamble.

How would you describe the students’ responses to the project? How did they react to the requirements and how do you think the final projects turned out?

I think that many students ended up enjoying the project, but responses varied at first. Students expressed frustration with the technology, saying they were not computer-savvy and were worried about having to learn a new program. I tried to reassure these students by outing myself as a millennial, promising half-jokingly that if I could learn to use it, they would find it a cinch. Unfortunately, I noticed that many students found the technology somewhat confusing despite the tutorial I delivered in class. After reading through student evaluations, I also realized that I should have weighted the final digital exhibit and presentation less heavily and included additional scaffolded assignments to minimize the end-of-semester crunch.

Despite these challenges, I was really impressed with the outcome. While clicking through the online exhibits, I could often imagine the artifacts and text set up in a physical museum space. Many students composed engaging label text, keeping their writing accessible to their imaginary museum visitors while still delivering a sophisticated interpretation of each artifact. In some cases, I found myself wishing students had prioritized deeper analysis over background information in their labels; if I assigned this project again, I would emphasize that aspect.

I learned a lot about what it means to support students through an unfamiliar semester-long project, and I’m glad they were willing to take on the challenge. I found that students appreciated the flexibility of the guidelines and the room this left for creativity. One student wrote that the project was “unique and fun, but still challenging, and let me pursue something I couldn’t have if we were just assigned a normal paper.”

If you’re interested in pursuing a project like this one and have more questions for Morgan, you can contact her at: morganjshahan@gmail.com. 

For other questions or help developing new assessments to use in your courses, contact the Center for Educational Resources (cerweb@jhu.edu).

Allon Brann, Teacher Support Specialist
Center for Educational Resources

Image Source: Morgan Shahan

Quick Tips: Formative Assessment Strategies

Designing effective assessments is a critical part of the teaching and learning process. Instructors use assessments, ideally aligned with learning objectives, to measure student achievement and determine whether or not they are meeting the objectives. Assessments can also inform instructors if they should consider making changes to their instructional method or delivery.

Assessments are generally categorized as either summative or formative. Summative assessments, usually graded, are used to measure student comprehension of material at the end of an instructional unit. They are often cumulative, providing a means for instructors to see how well students are meeting certain standards. Instructors are largely familiar with summative assessments. Examples include:

  • Final exam at the end of the semester
  • Term paper due mid-semester
  • Final project at the end of a course

In contrast, formative assessments provide ongoing feedback to students in order to help identify gaps in their learning. They are lower stakes than summative assessments and often ungraded. Additionally, formative assessments help instructors determine the effectiveness of their teaching; instructors can then use this information to make adjustments to their instructional approach which may lead to improved student success (Boston). As discussed in a previous Innovative Instructor post about the value of formative assessments, when instructors provide formative feedback to students, they give students the tools to assess their own progress toward learning goals (Wilson). This empowers students to recognize their strengths and weaknesses and may help motivate them to improve their academic performance.

Examples of formative assessment strategies:

  • Surveys – Surveys can be given at the beginning, middle, and/or end of the semester.
  • Minute papers – Very short, in-class writing activity in which students summarize the main ideas of a lecture or class activity, usually at the end of class.
  • Polling – Students respond as a group to questions posed by the instructor using technology such as iclickers, software such as Poll Everywhere, or simply raising their hands.
  • Exit tickets – At the end of class, students respond to a short prompt given by the instructor usually having to do with that day’s lesson, such as, “What readings were most helpful to you in preparing for today’s lesson?”
  • Muddiest point – Students write down what they think was the most confusing or difficult part of a lesson.
  • Concept map – Students create a diagram of how concepts relate to each other.
  • First draft – Students submit a first draft of a paper, assignment, etc. and receive targeted feedback before submitting a final draft.
  • Student self-evaluation/reflection
  • Low/no-grade quizzes

Formative assessments do not have to take a lot of time to administer. They can be spontaneous, such as having an in-class question and answer session which provides results in real time, or they can be planned, such as giving a short, ungraded quiz used as a knowledge check. In either case, the goal is the same: to monitor student learning and guide instructors in future decision making regarding their instruction. Following best practices, instructors should strive to use a variety of both formative and summative assessments in order to meet the needs of all students.

References:

Boston, C. (2002). The Concept of Formative Assessment. College Park, MD: ERIC Clearinghouse on Assessment and Evaluation. (ERIC Document Reproduction Service No. ED470206).

Wilson, S. (February 13, 2014). The Characteristics of High-Quality Formative Assessments. The Innovative Instructor Blog. http://ii.library.jhu.edu/2014/02/13/the-characteristics-of-high-quality-formative-assessments/

Amy Brusini
Senior Instructional Designer
Center for Educational Resources

Image Source: Pixabay

Teaching a Multi-Disciplinary Course

On Wednesday, October 16, the Center for Educational Resources (CER) hosted the first Lunch and Learn for the 2019-2020 academic year. Steve Marra, Associate Teaching Professor, Mechanical Engineering, Susan Weiss, Associate Professor, jointly appointed in Musicology at the Peabody Institute and the Department of Modern Languages in the Krieger School of Arts and Sciences, and Nathan Scott, Associate Teaching Professor, Mechanical Engineering presented on Teaching a Multi-Disciplinary Course.

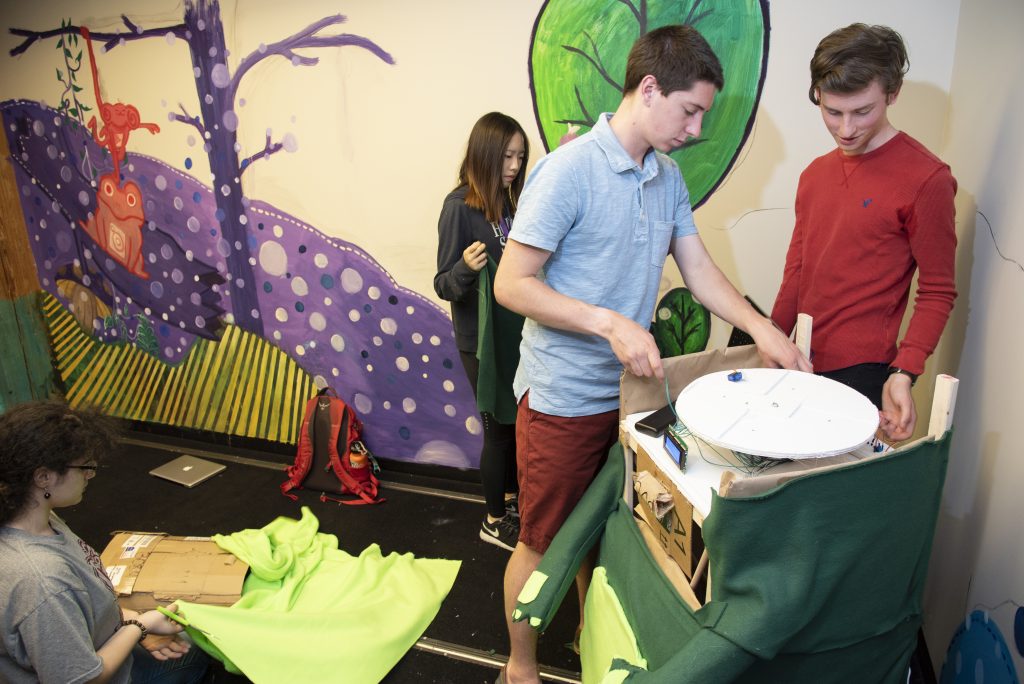
Steve Marra began the presentation by describing an Interdisciplinary Multi-Institutional Design Experience for Freshman Engineering and Art Students that took place in the Spring of 2018. This was a joint project initiated by instructors from JHU and the Maryland Institute College of Art (MICA). There were 44 students from JHU and 34 students from MICA who participated in the project. Marra described the project as having purposely vague specifications in order to allow for as much creativity as possible. Teams were given $100 to build something safe and interactive, with a variety of hard and soft materials over the course of 13 weeks that would “make your world better.” Each school determined its own grading schema; JHU students were graded on design reports and project notebooks, MICA students were graded on preliminary sketches and documentation, and all students were graded on quality of work. The project culminated with a week-long exhibition at MICA at the end of the semester.

Marra continued by describing obstacles encountered when implementing this project. One of the most significant challenges was scheduling and transporting students between campuses. While the faculty had considered this might pose a challenge in the initial stages of the project, transportation and scheduling conflicts were more of an issue than expected. Another challenge was the separation/isolation of work within student groups; in general, engineering students embraced the engineering tasks while art students gravitated toward the artistic tasks. They did work with each other but took on a ‘divide and conquer’ approach in most cases, rather than collaborating as much as the faculty had hoped.

Other unexpected challenges included:

  • Conflicting advice given to students by instructors. Marra commented that there was not enough collaboration between instructors ahead of time.
  • Staggered spring breaks between the two schools, resulting in two weeks of no work getting accomplished.
  • Multitude and diversity of projects due to vague assignment specifications. Marra commented that diversity of projects is normally celebrated, but in this case it made it difficult to efficiently assist students with their projects.

Despite the various challenges, student teams met their deadlines and created 18 projects in all for the exhibition. These included: a hugging machine, mega backpack, relaxation station, and a marble run. Marra concluded with suggestions for improvement:

  • Plan early
  • Develop a more focused assignment with very clear specifications
  • Schedule a kickoff meeting with icebreakers
  • Take time to teach teamwork and conflict resolution
  • Provide instruction on ideation
  • Develop an advising strategy
  • Do not underestimate the importance of convenient transportation

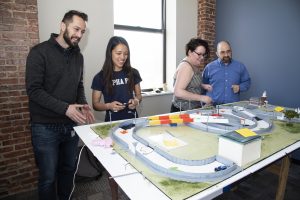
Susan Weiss continued the presentation by describing the course she co-teaches with Nathan Scott, History and Technology of Musical Instruments, which is offered jointly by ASEN and Peabody. Students are tasked with building their own instruments from scratch or repairing broken instruments in various states of disrepair. Materials used have expanded from simple cigar boxes and PCV pipe to much more sophisticated materials as the course has progressed and more funding has become available. Weiss noted that the content and direction of the course depends on the guests that are available to come in and work with the students during the semester, such as luthiers, professional musicians, guest speakers, etc. Students are graded on journal entries, weekly reflections, and presentations.

Weiss went on to describe some of the challenges with this course. One of the biggest challenges is the constant struggle to find a space for students to construct the instruments. In the past, students have used maker spaces at Homewood but most recently have been using a room in the basement of Peabody’s Leakin Hall. Finding the necessary raw materials can also be a challenge especially with budgetary constraints. Weiss also mentioned how students in this course tend to gravitate to their area of expertise, but that they have checks in place to ensure that students are sharing tasks equitably and learning from each other’s strengths.

Despite its challenges, the course continues to grow and evolve. When it first started, students were making cigar box guitars and other small instruments. Two years ago students built banjos; this past year, they took on the challenge of building cellos which they had the opportunity to play at the Whiting School of Engineering’s Design Day. Weiss noted how highly students rate this course and how much they appreciate the unique opportunity to collaborate and learn from other students.

Nathan Scott extended the presentation into a more philosophical discussion of what it means to be a student who embraces multi-disciplinary studies.  He likened a student who is not merely after a degree to a child who grows up in a bilingual or multilingual home.  That child, he stated, not only learns multiple languages naturally, but also has a brain now trained to learn skills more readily or easily than a child not exposed to multiple languages. He referred to this child as a ‘super learner.’

Scott noted that most research at JHU is multi-disciplinary and that there are fantastic opportunities for undergraduates to take part in this research and experience ‘super learning.’ He believes that our university, as a whole, could better design curriculum to ensure multi-disciplinary education for all students.  He suggested adding a graduation requirement for all WSE majors to complete a substantial, two-semester capstone project.  No classes would be held on Fridays, which would become ‘project days,’ so students from all majors could work together in teams to complete their projects.  In addition, students would have a collaborative space that would be their ‘home’ throughout their undergraduate years to develop community.

Below are some questions from audience members with answers from the presenters.

Q: (for Marra) The MICA/JHU course was worth one credit; wasn’t that a great deal of work for faculty and students?

Marra responded that while the course was only one credit, it was worth it because of the learning that occurred. However, if he did this project again, he would make some significant changes, such as limiting it to only Hopkins students to minimize the issues with logistics and schedules.  Marra did note that the credit hours rarely are a true reflection of the work necessary for the course by students or faculty.

Q: (for all) What is the payoff of the interdisciplinary course?

Scott reported that employers are hungry to hear about these experiences and meet students who have completed multi-disciplinary projects, not just taken x course or y course.  His ideal would be to have a campus design center where artists and experts in residence bring their skills to JHU and have student apprentices.

Marra remarked that interdisciplinary skills are different than team skills and that employers are recognizing the value of interdisciplinary skills. Students are often uncomfortable working in these types of environments and grow from the experience.

Weiss noted that students don’t necessarily have skills in one area or another, but as they collaborate, they discover each other’s abilities, and it is a revelation for them.

Q: (for Marra) How would you manage the issue of students gravitating toward their area of expertise if you ran this project again?

Marra responded that he would make it some sort of requirement that students demonstrate skills in their non-dominant major or skill set.

Read more about Steve Marra’s project in a recent HUB article. Read more about Susan Weiss and Nathan Scott’s course in this Peabody Post article.

Amy Brusini, Senior Instructional Designer
Center for Educational Resources

Photo credits: Steve Marra and Susan Weiss

Exhibiting the Avant Garde: Rare Primary Sources as Pedagogy

[Guest post by Molly Warnock, Assistant Professor, History of Art, Johns Hopkins University]

The library is often called the lab of the humanities. In my experience, the Johns Hopkins Sheridan Libraries embraces this role. I collaborate regularly with the Libraries’ staff to encourage students not only to use library resources to conduct their research but also to use the physical space to present their findings. In several of my undergraduate art history courses, students curate an exhibition as one of their major assignments. This article provides an overview of my collaboration with the Sheridan Libraries and describes a model that my colleagues are considering adopting for their own course projects.

The collaboration began when I discovered the extensive modern and avant-garde collections owned by the Libraries, which boast vast reserves of journals, rare exhibition catalogues, and artists’ books, as well as posters, pamphlets, and other ephemera. I Students viewing library exhibitwanted to integrate these materials into my courses, and started by setting aside a day or two every semester to visit Special Collections. Now virtually all of my courses at all levels include multiple sessions of this sort. For example, my introductory survey “Modern Art, 1880-1950,” includes thematic visits devoted to such topics as Futurist typography, the role of journals and little magazines in the spread of experimental practices, and utopian urbanism. These visits allow students to see and in many cases handle rare primary materials, adding substantively to our discussions in the classroom. They are almost always surprised to discover the extent of our collections.

The curatorial seminars that I have developed over the past six years are specifically aimed at increasing student engagement with these important library holdings. Each course is in certain respects a traditional seminar, focused on some area of twentieth-century practice. We have weekly readings, look at digital slideshows, and discuss various case studies. At the same time, however, students immerse themselves in a semester-long, hands-on curatorial project centered on one particular aspect of our subject matter. The first such course, “Surrealism,” produced a survey of Surrealist journals (“Surrealism at Mid-Century”), while the second, “The ‘Long Sixties’ in Europe,” turned the spotlight on the library’s wealth of Lettrist books, journals, posters, photographs, and film scripts, among other items (“Presenting: Lettrism”). Additional iterations of “The ‘Long Sixties’” have focused on the library’s recently expanded trove of materials relating to the avant-garde group Cobra (“Asger Jorn and Cobra”) and on the Paris-based journal Robho (“Robho in Context”). Student contributions drive all stages of the project, including: researching and studying the available holdings; crafting a final object list; writing exhibition labels for the selected works; and designing the exhibition layout. At the exhibition opening, the students serve as docents, guiding interested members of the Hopkins community through the show.

Students showing exhibit to library patronsCollectively curating an exhibition in one semester means negotiating difficult time constraints. I start my course planning by identifying a long list of objects relevant to my course. Throughout this period, I consult extensively with Don Juedes, the dedicated librarian for History of Art. We then meet with Mark Pollei and Alessandro Scola of the Conservation and Preservation team to ensure that the pre-selected objects are stable enough to be handled repeatedly and determine vulnerabilities that would have to be taken into consideration for exhibition—whether, for instance, a particular book or journal is especially light sensitive, or can only be opened halfway. Once the semester is underway, students begin working on the exhibition immediately. Within the first week, we’re in Special Collections, where students get their first peek of the objects cleared for exhibition; each selects a few to research individually. I provide some initial context, but encourage them to choose based on their broader interests or curiosity about specific items.

One of the course goals is to teach students how to interpret primary materials using different research strategies. Their first assignment is to outline a research plan for each of their chosen objects. Don introduces the students to library resources and teaches them the skills needed to conduct their research: for example, how to meaningfully generate and delimit searches in our online catalogue and how to navigate various databases and bibliographies. They have to locate relevant materials using the strategies Don has shared with them, and indicate how they plan to build an argument from these sources. This can be quite challenging in the case of objects that have not been studied extensively by scholars to date. I provide feedback and encourage them to think broadly about different angles of attack, from the more obvious (researching the artist or author) to the less immediately apparent (researching a gallery’s broader exhibition agenda).

By mid-semester, we are all back in Special Collections, where the students present their objects and recommend specific display options, based on their research findings and the various larger stories we might wish to tell. We then move into the most exciting—and difficult—phase: experimenting with different installation plans and whittling down our final object selection. We mark off spaces equivalent to the various display cases and physically move things around until we feel we’ve arrived at a coherent, visually compelling narrative.Students making adjustments to exhibit objects The Conservation and Preservation team stop by again to consult with us about our display concept, and then spend roughly a month and a half preparing the featured materials, building customized cradles, and installing the objects. The students use that same period to produce and collectively edit the banner text and individual object labels. The official opening usually takes place in the penultimate week of the semester and serves as a celebratory capstone for the course as a whole.

As an instructor, it is deeply satisfying to see how seriously the students take one another’s research, and how effectively a collaborative project of this sort can help to build community. I find myself continually refining my pedagogical approach to facilitate this. One crucial step was simply to limit the class size to a maximum of ten students. I’ve also explored the potential of new technological platforms to facilitate more lateral processes of peer-to-peer discussion and group editing. For example, having students generate and refine all exhibition-related texts in Google Docs allows me to afford class participants greater responsibility for the finished products, while still tracking individual contributions. This can be awkward at first, as students may not have prior experience giving one another constructive criticism. But they quickly learn that robust peer critique results in a better overall outcome: an exhibition that represents all of their contributions.

In their course evaluations, students rate this experience highly positively. One described “the opportunity to curate an exhibition and work with objects from the library’s collections” as “truly special,” while another called it “unlike anything I had done for a course at Hopkins before,” adding: “Interacting with one another so regularly to work on the exhibition also built a great sense of community among the students.” A third noted: “I really enjoyed getting to spend so much time physically with all these artifacts, and doing research on objects JHU owned.”

This project has also deepened my working relationship with Don Juedes. Don’s assistance has been instrumental at every stage. Early on, he helped me to put together an exhibition proposal and worked with the exhibition committee to significantly expedite the review process, which had previously taken several months. (Based on the success of previous course- related curatorial project, the Libraries now dedicate a regular slot in the calendar to our exhibitions.) He has also worked closely with library staff from multiple departments to streamline workflows and pin down a project timeline.

At the same time, Don and I consult regularly about the collections and often tailor new acquisitions in my research area to the courses I plan to teach and the kind of student-curated exhibitions that might accompany them.Students working to prepare exhibit For the students, there is an added benefit: working closely with Don teaches them the multi-faceted role that libraries play in supporting the scholarly community. They see that libraries are not just passive repositories but have a highly active custodial and, indeed, curatorial role, assembling and caring for the materials that enable forward-looking research and teaching. They learn the importance of developing relationships with library staff that can provide complementary expertise and assist in the discovery process. The students in these curatorial seminars often become avid library patrons, returning to use primary sources for other courses and independent research projects.

My partnership with the library has changed how I teach and opened up new learning experiences for students. I feel incredibly fortunate that the Libraries’ leadership and outstanding staff at all levels fully grasp the importance of teaching with objects and so generously support pedagogical innovation and collaboration in this area.

Molly Warnock, Assistant Professor
History of Art, Johns Hopkins University

In addition to critical surveys of modern and contemporary art, Molly Warnock’s recent and forthcoming undergraduate courses include several seminars with curatorial components, each focused on particular aspects of twentieth-century practice and culminating in an exhibition of journals and other ephemera from the Special Collections of the Sheridan Libraries. Recent graduate courses have explored the philosophical underpinnings of art history as a modern discipline; problems in abstraction; theories of painting and subjectivity; and the concept of an aesthetic medium, among other topics.

Image Source: Don Juedes

Empowering Students through Guided Reflection

[Guest post by Pamela Sheff, Director, Center for Leadership Education, Johns Hopkins University]

lighthouseEach spring, I teach a course called Culture of the Engineering Profession for the Center for Leadership Education in the Whiting School. Primarily through discussions and projects, students in this class investigate what it means to be an engineer, identify contemporary issues in engineering, and consider the ethical guidelines of the engineering profession. The majority of students in the Spring 2019 class were Chemical and Biomolecular Engineering majors with a Mechanical Engineering student mixed in. This semester, I decided to experiment somewhat with guided reflection, a metacognitive practice that was new for many of these students.

One of the goals of the course is to help students strengthen their communication skills; therefore I leverage a great deal of class discussion including a requirement for students to lead a discussion at least once during the semester. Several times during the semester, I guided the students in reflecting not only on the quality of their discussions, but also on the culture of the classroom as a whole. I raised questions such as the following: What is working well? What could be changed? What values do students want in the classroom? From this reflective exercise the students generated a rubric listing characteristics including accountability, respect, and transparency. Every couple of weeks, I asked them to reflect on how they were doing as a group by reviewing the list.

After about six weeks, I noticed the group coming to consensus on what they felt was working in our classroom practice and what needed to change.  For example, one idea suggested by the group was to speak purposefully during discussions.  Students should not talk simply to be heard, but to move the discussion forward. Results included higher quality discussions and improved leadership skills.

The success of using a rubric to guide class discussions led me to continue using reflection to help students evaluate their major projects.  We talked during class about effective project criteria, for example, and what they should look for in the posters they would see at the course-wide poster fair.  The teaching assistants in the class then compiled the list of suggestions, which helped the students create strong written critiques after the fair. I talked with the class about how to assign grades to the team discussions they had been leading. Again, we worked in class to develop a list of criteria to consider and, the TAs and I developed the grading rubric. I then gave the students an opportunity to comment on the rubric before it was finalized. I also made the decision to allow students to grade their own projects according to the rubric. If I agreed with the grade they chose, the grade stood.  If not, I modified the grade. In a class of 29 students, I only had to lower two grades.  I did raise three grades, in cases where the students were unduly critical of their efforts.

The results of continuous guided reflection? The projects were the best I have ever seen in this class, and I could not have been more pleased. I attribute the high quality of work to students taking ownership of the process. It pushed them to live up to the standards they defined for themselves, and in many cases, go beyond them.  Providing space for students to reflect on what they were working towards led them to act more purposefully and, in turn, allowed me to give them agency over the classroom. I am thrilled with the way this approach worked out and am planning to use it again in future semesters.

Pamela Sheff, Associate Teaching Professor and Director
Center for Leadership Education, Johns Hopkins University

Pamela Sheff is an award-winning writer and marketing communications consultant, with a wealth of experience developing marketing, public relations and communications strategies for clients ranging from start-ups to large corporate, institutional and government organizations. Now a full-time lecturer in the Center for Leadership Education, Pam has taught business communications for private companies and directed the Writing Program at Goucher College.

Image Source: Pixabay